

An Exposé on How to Properly Expose Your Photo Subjects under Colorado's Hard Sunlight
No AI was used in the writing of this blog post!
The following article was inspired by a comment I received on Reddit while sharing some of my wedding photography work, from a user named Integra94 who asked…

Good quality lighting for photography and video production is widely considered to be lighting that is soft, diffused, and gentle on human skin.
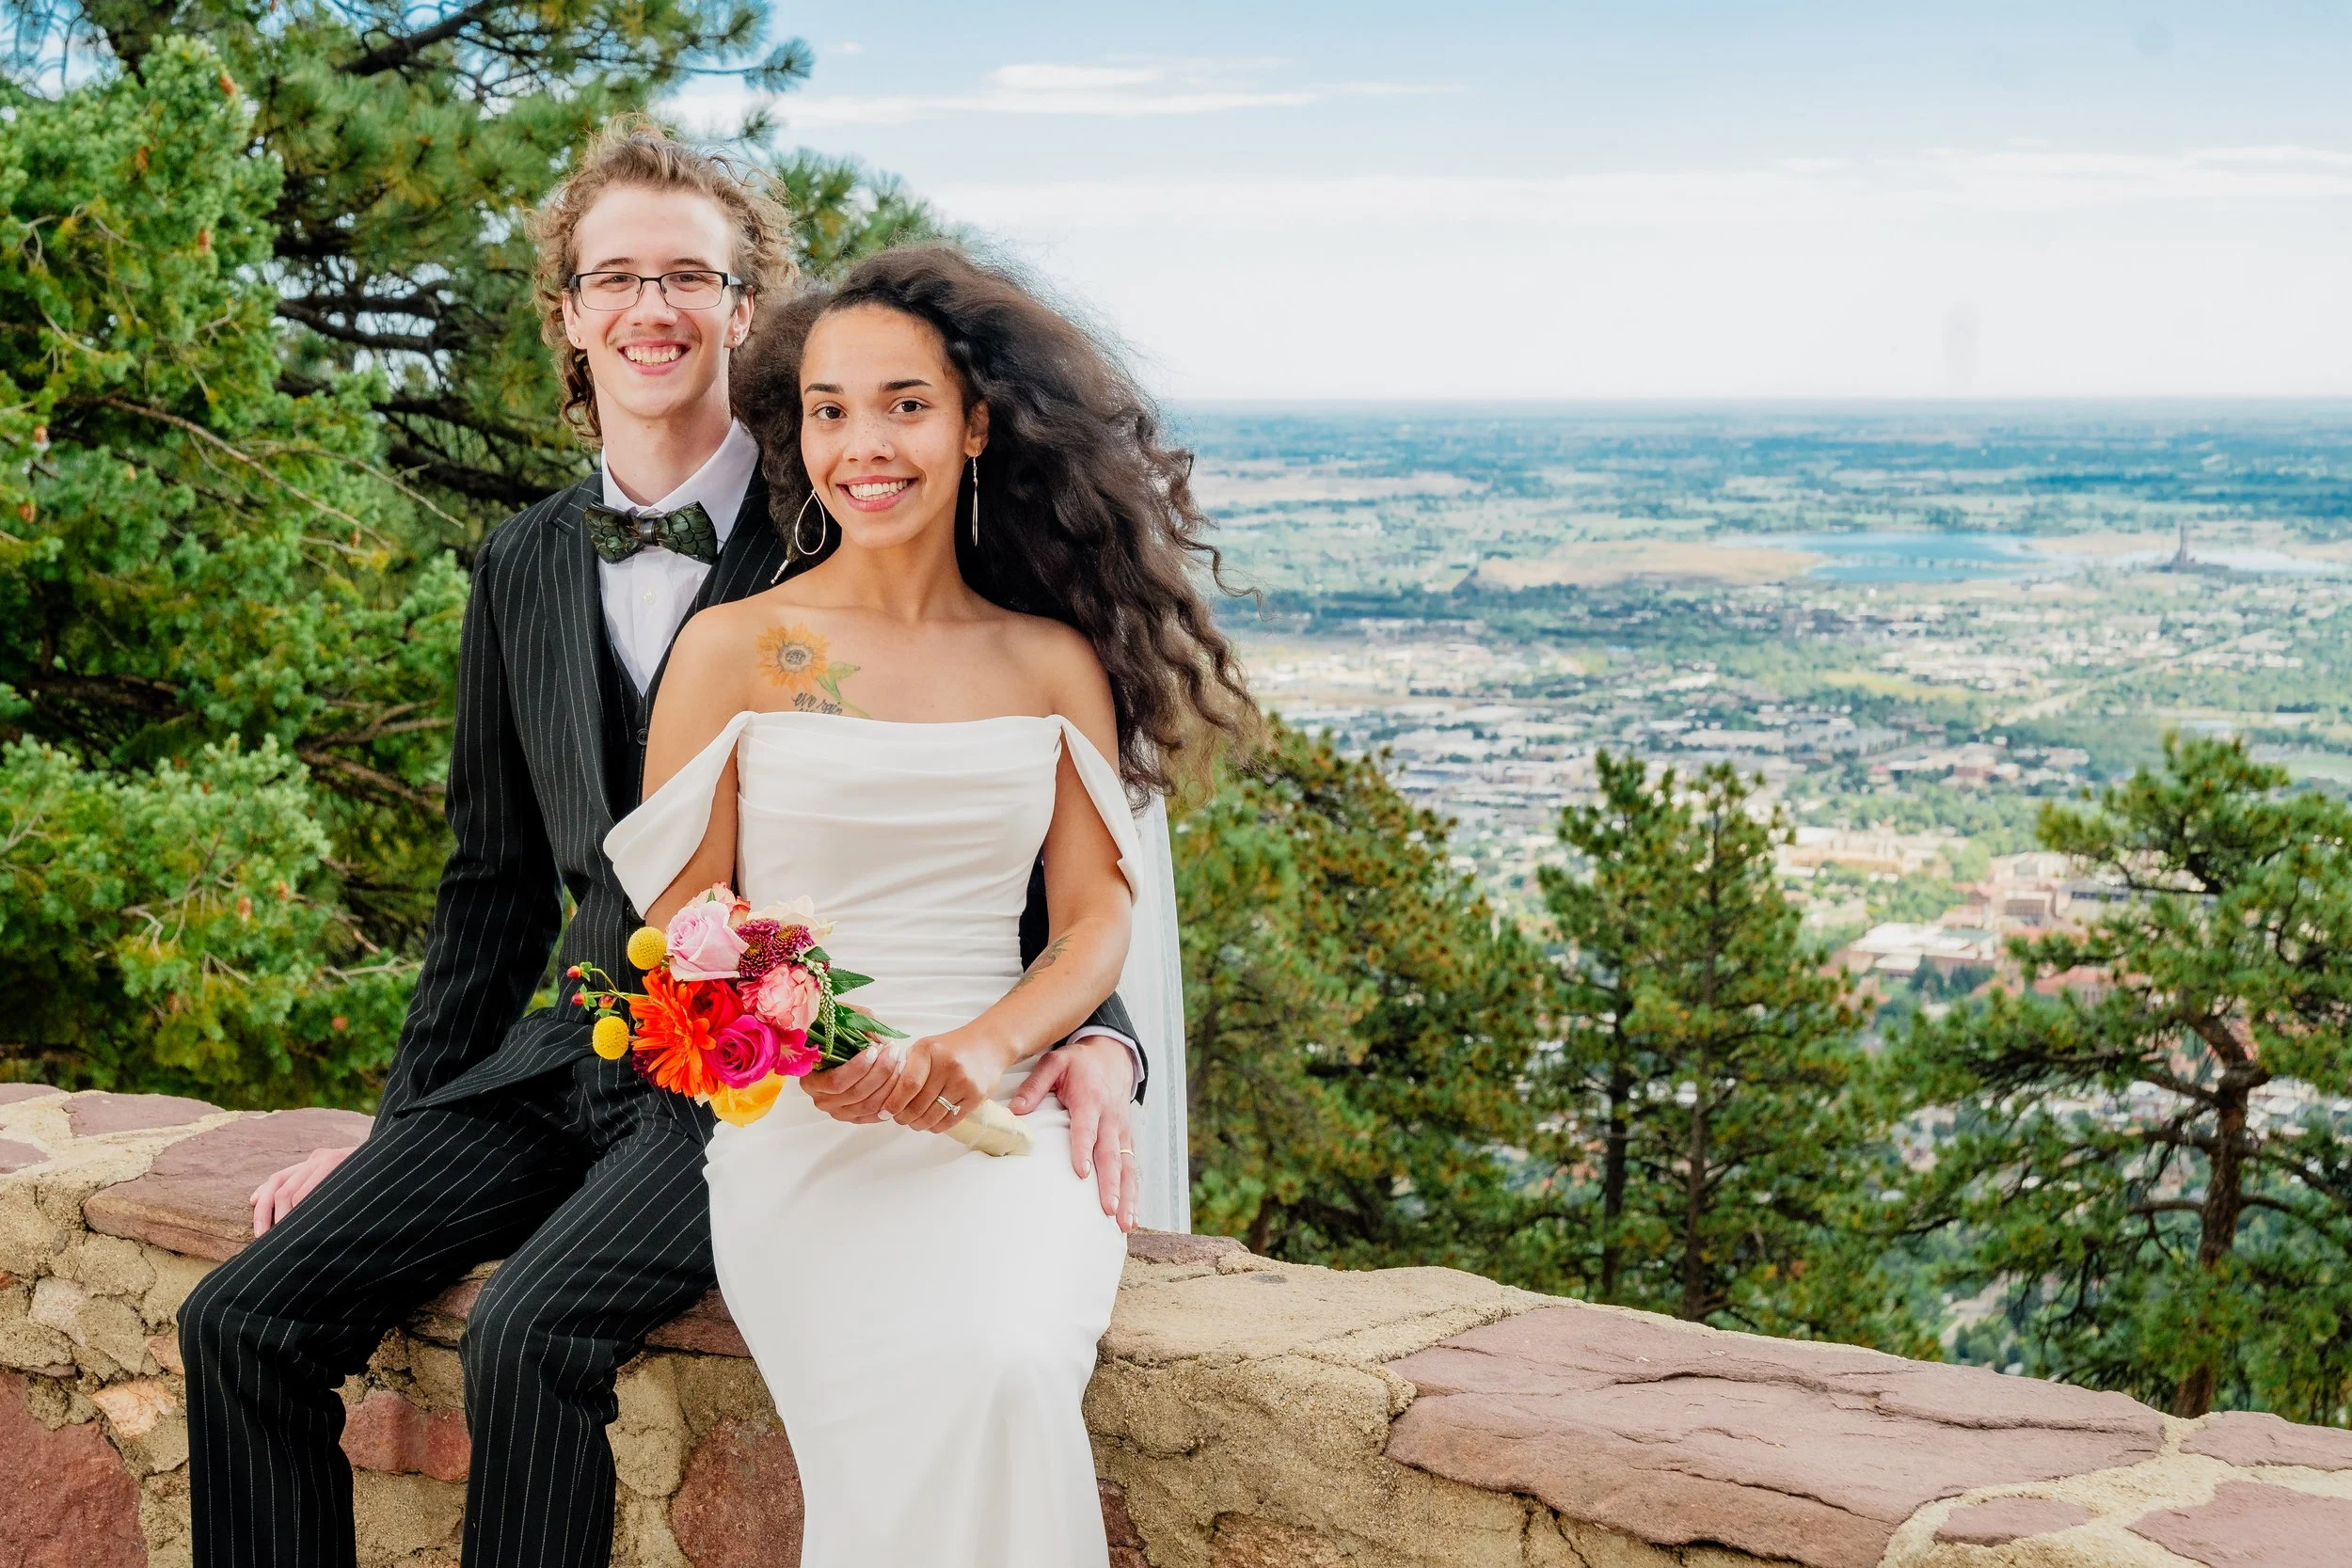
One of the images amongst the select images pulled from Kolby and Connor’s wedding that Reddit user Integra94 was referring to.
Which are the exact OPPOSITE qualities that the Colorado Sun provides people on their wedding days, their daughter’s quinceañeras, and their annual community outdoor events. On average, Colorado provides our state with more days of direct, undiffused, and hard sunlight than even Florida, “The Sunshine State”.
Some states, such as those in the Pacific Northwest, gracefully cover their inhabitants with continuous cloud-diffused sunlight in a manner comparable to a loving grandmother gently adorning a doe-eyed baby deer with a delicately hand-woven Alpaca-wool coat.
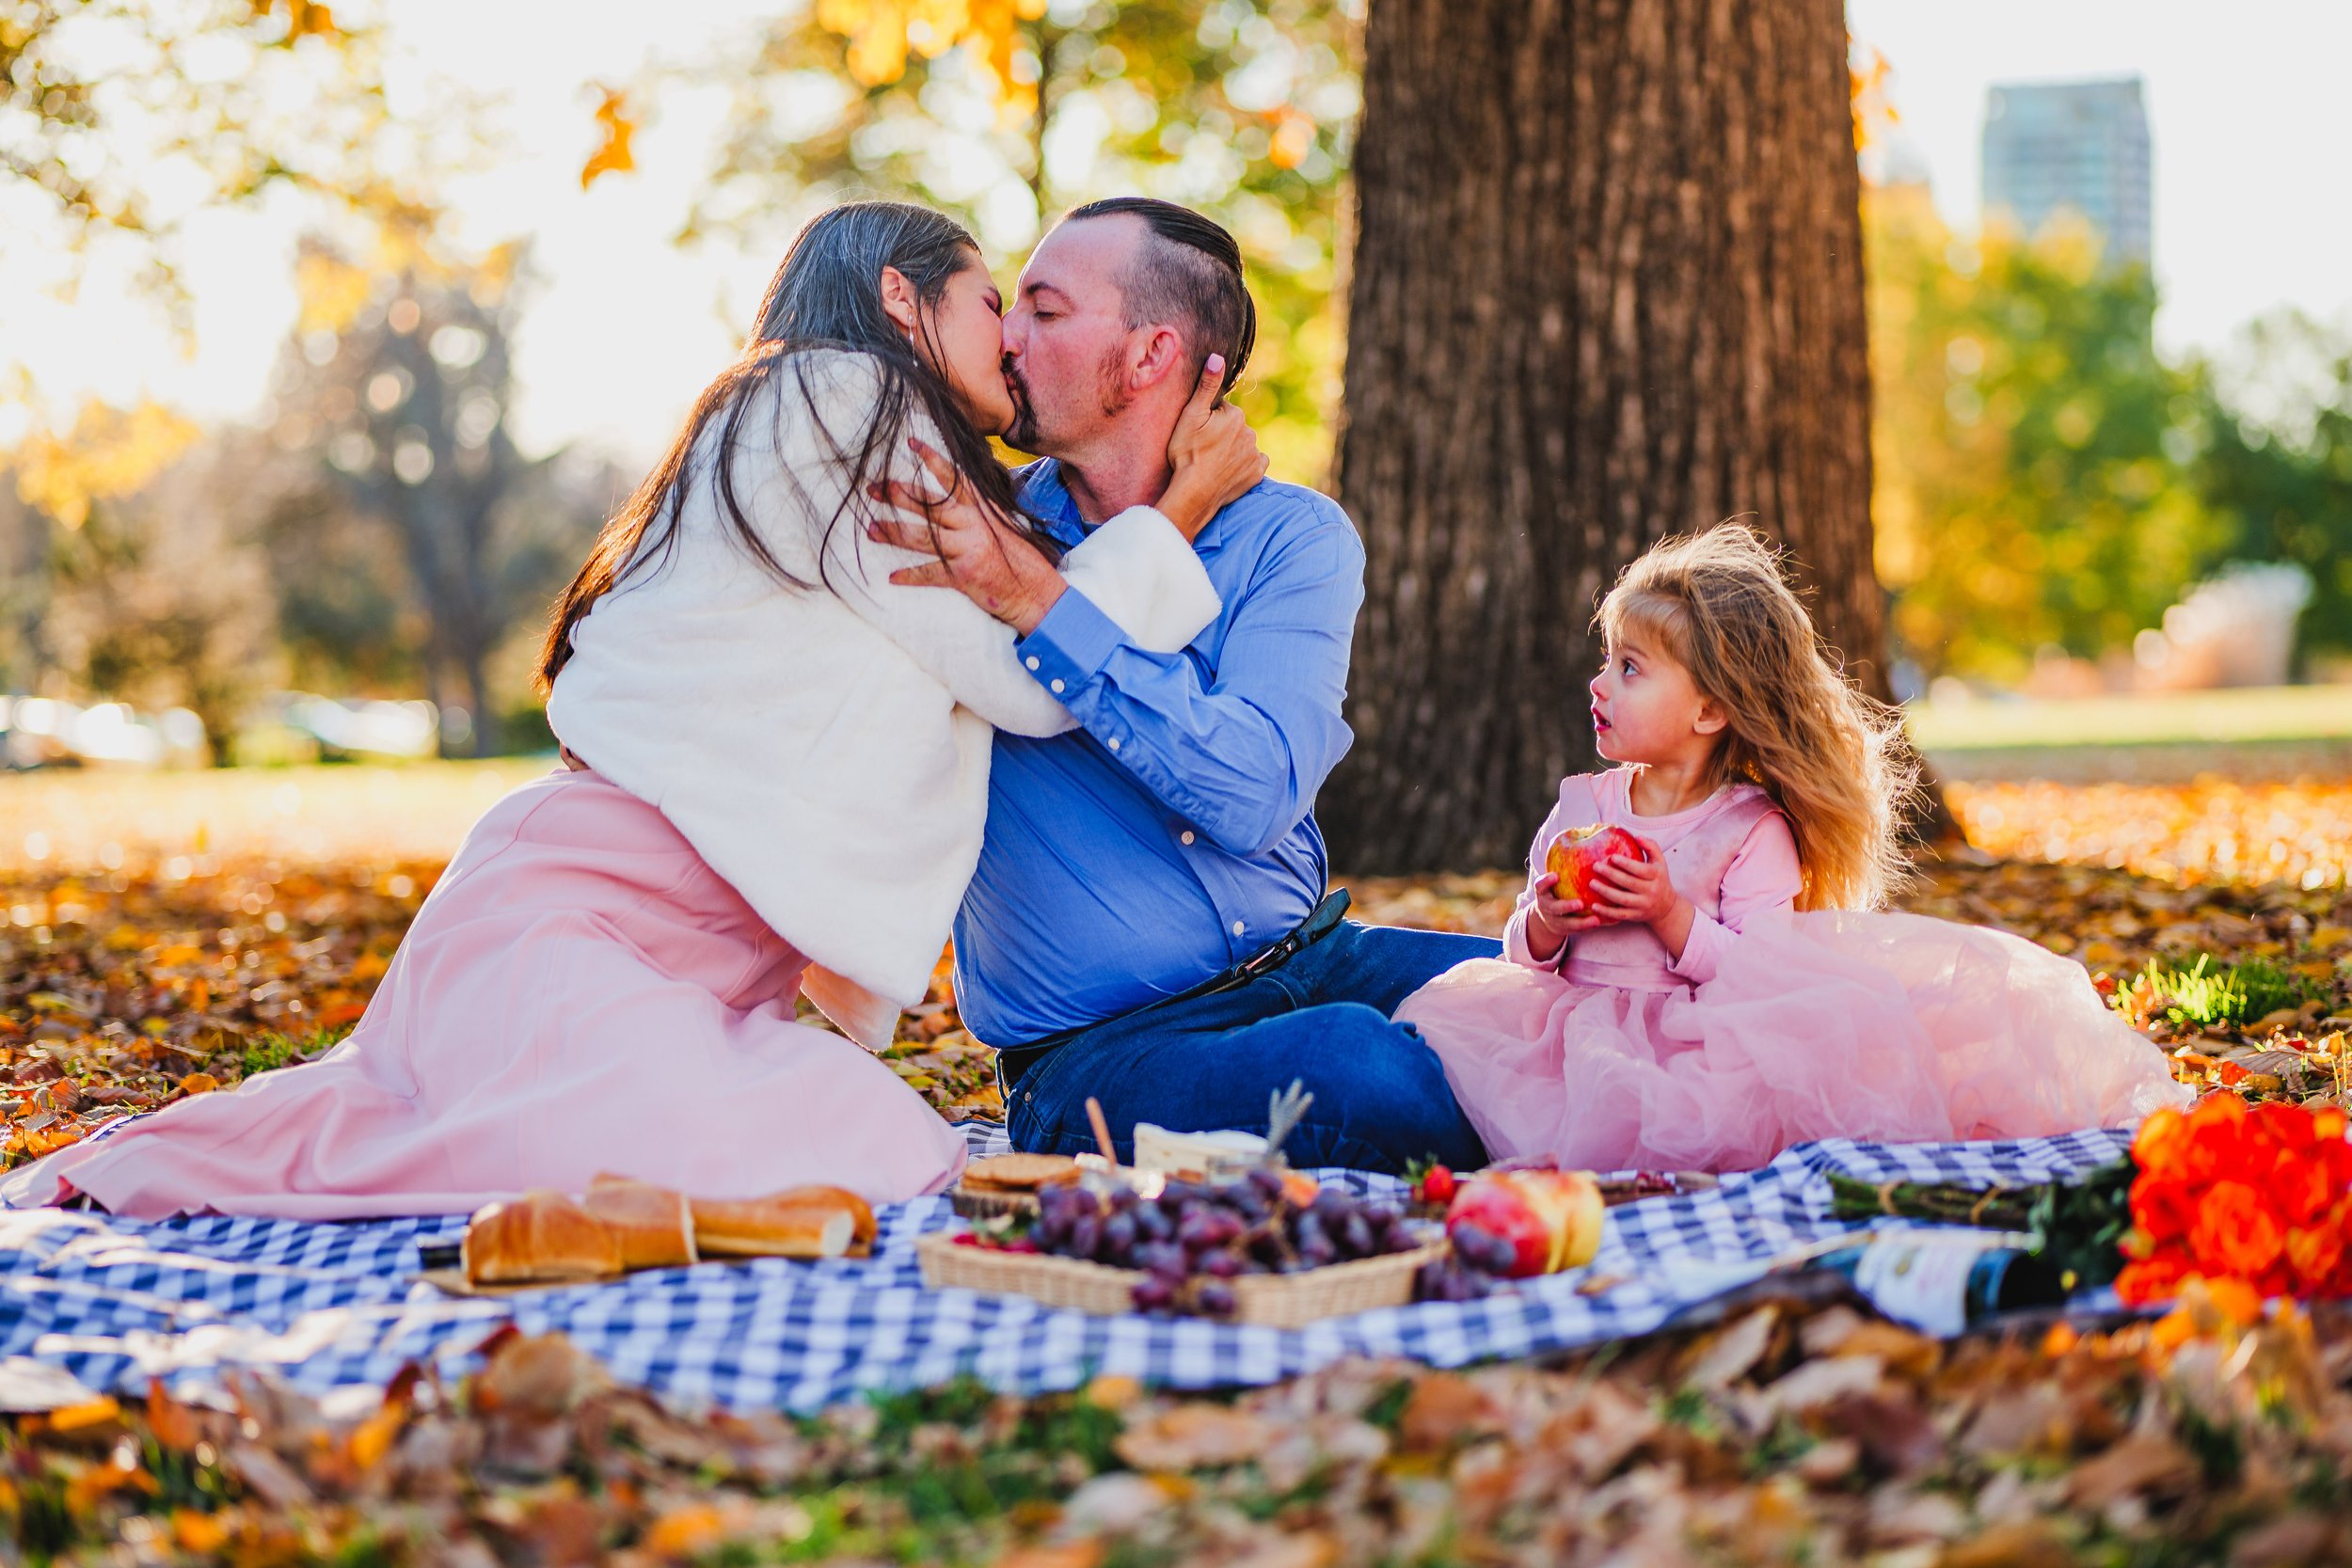
An example of “soft lighting” taken in Colorado! This photograph features my client enjoying an Autumn picnic with his family to celebrate he and his partner’s engagement. The photo was captured in the shade of a canopy of trees within a public park and then complimented with additional lighting from a speedlight mounted to a lightstand and diffused with an umbrella.
Colorado’s sunlight, which not only receives VERY limited cloud coverage but ALSO lacks the added mile of atmospheric particles to soften the sunlight at least a little bit, is much more comparable to, oh I don’t know, let’s say the tailgate of a Ford F-150 hitting you in the face while it’s doing donuts in a Circle K parking lot.
Ooooooh Weeee!

An example of the standard “hard lighting” you can expect on your standard, cloudless, Colorado day…Alright, ALRIGHT, fine it’s actually a still frame from “Terminator 2: Judgement Day” in a scene depicting a nuclear Apocalypse. But ya know, the lighting in Colorado DOES quite often feel like this!
So what’s a photographer to do? Before I begin listing the various methods I use to resolve this issue, know that many of the tips I’ll be sharing can be mixed and matched between themselves for varying situations. You’ll definitely benefit from practicing, so don’t be afraid to experiment!
Lean towards Underexposing your Image
Specifically, consider underexposing your image by 1-2 stops.
Most modern camera systems save more information in the shadows than they do in the highlights. What this means is that if you’ve adjusted your camera’s settings so that the brighter elements of your image are properly exposed, then often your image will ultimately look better once you’ve lifted the shadows in your photo editing software than it would have had you exposed the image for your subject and then tried to push down the brighter portions of your image while editing afterwards.
Because there’s (color, and luma) data in them thar shadows and there ain’t NOTHIN’ in them highlights.
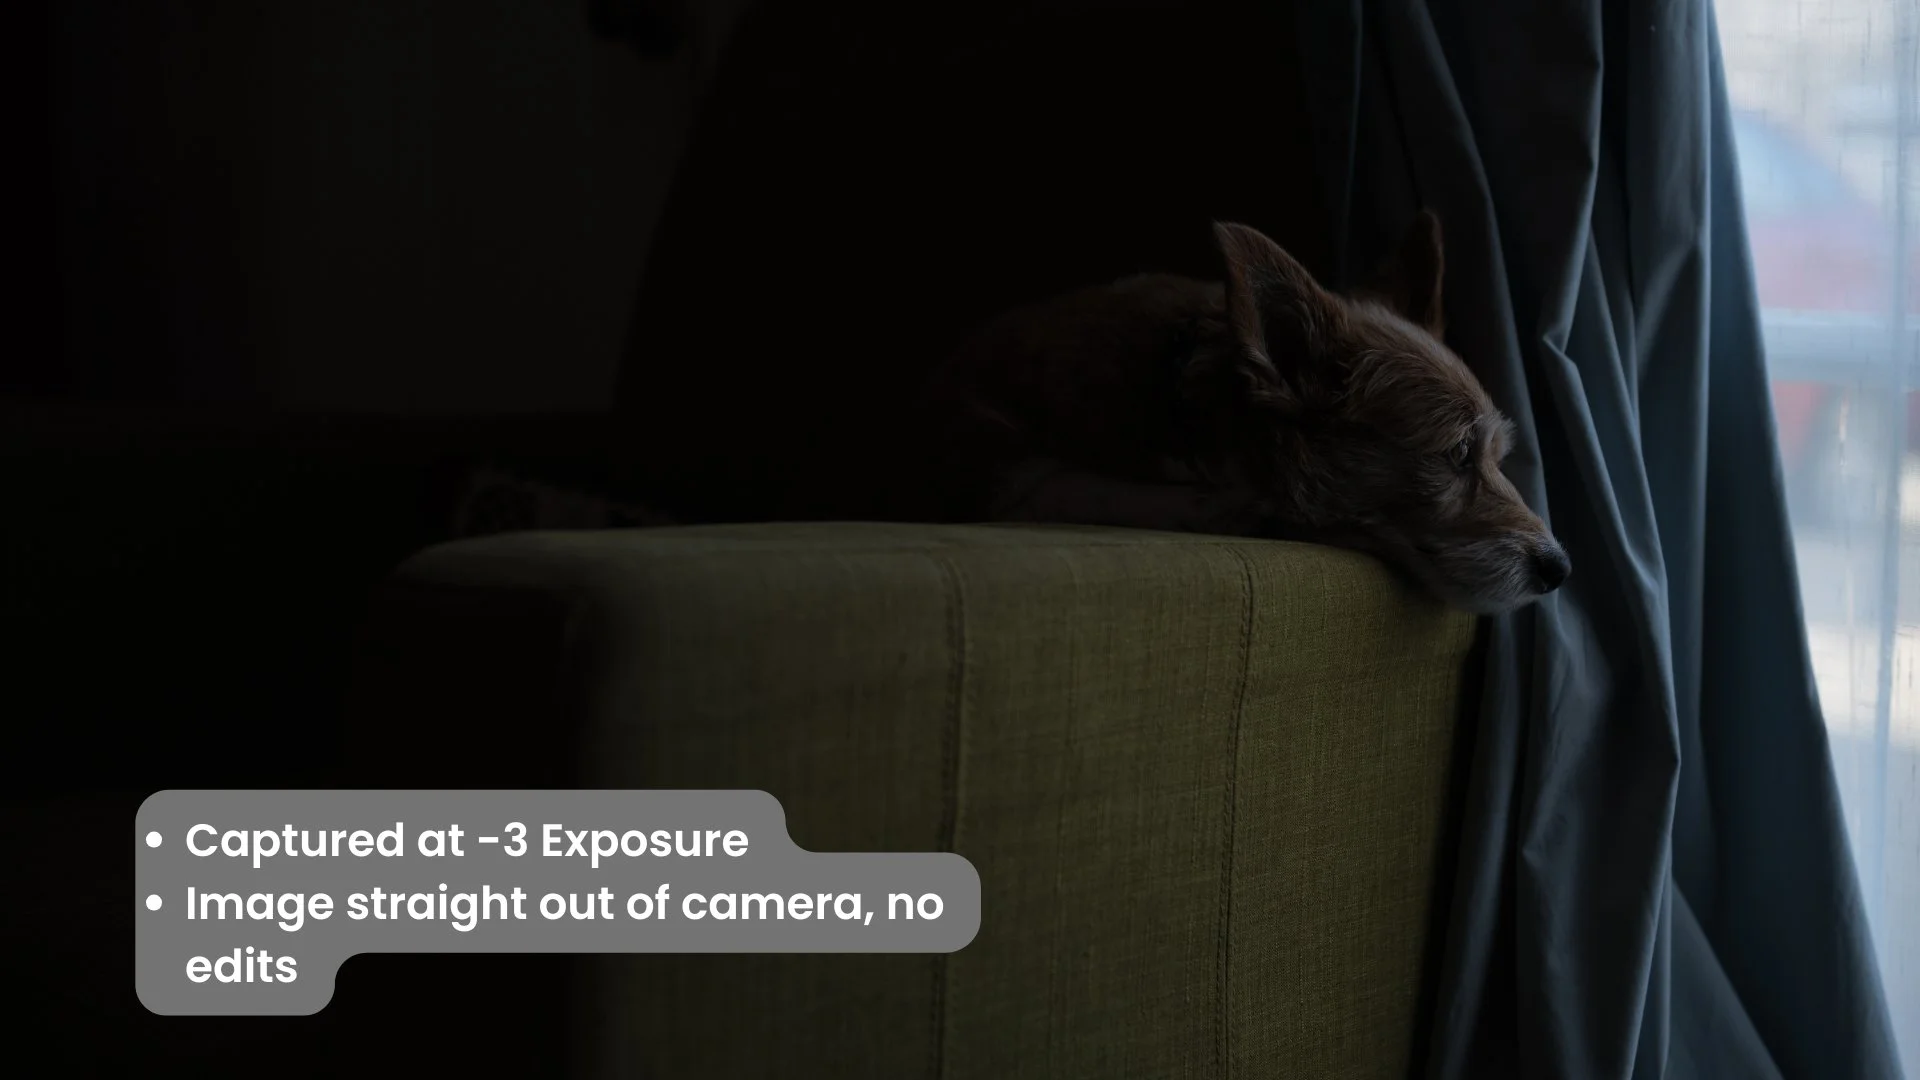
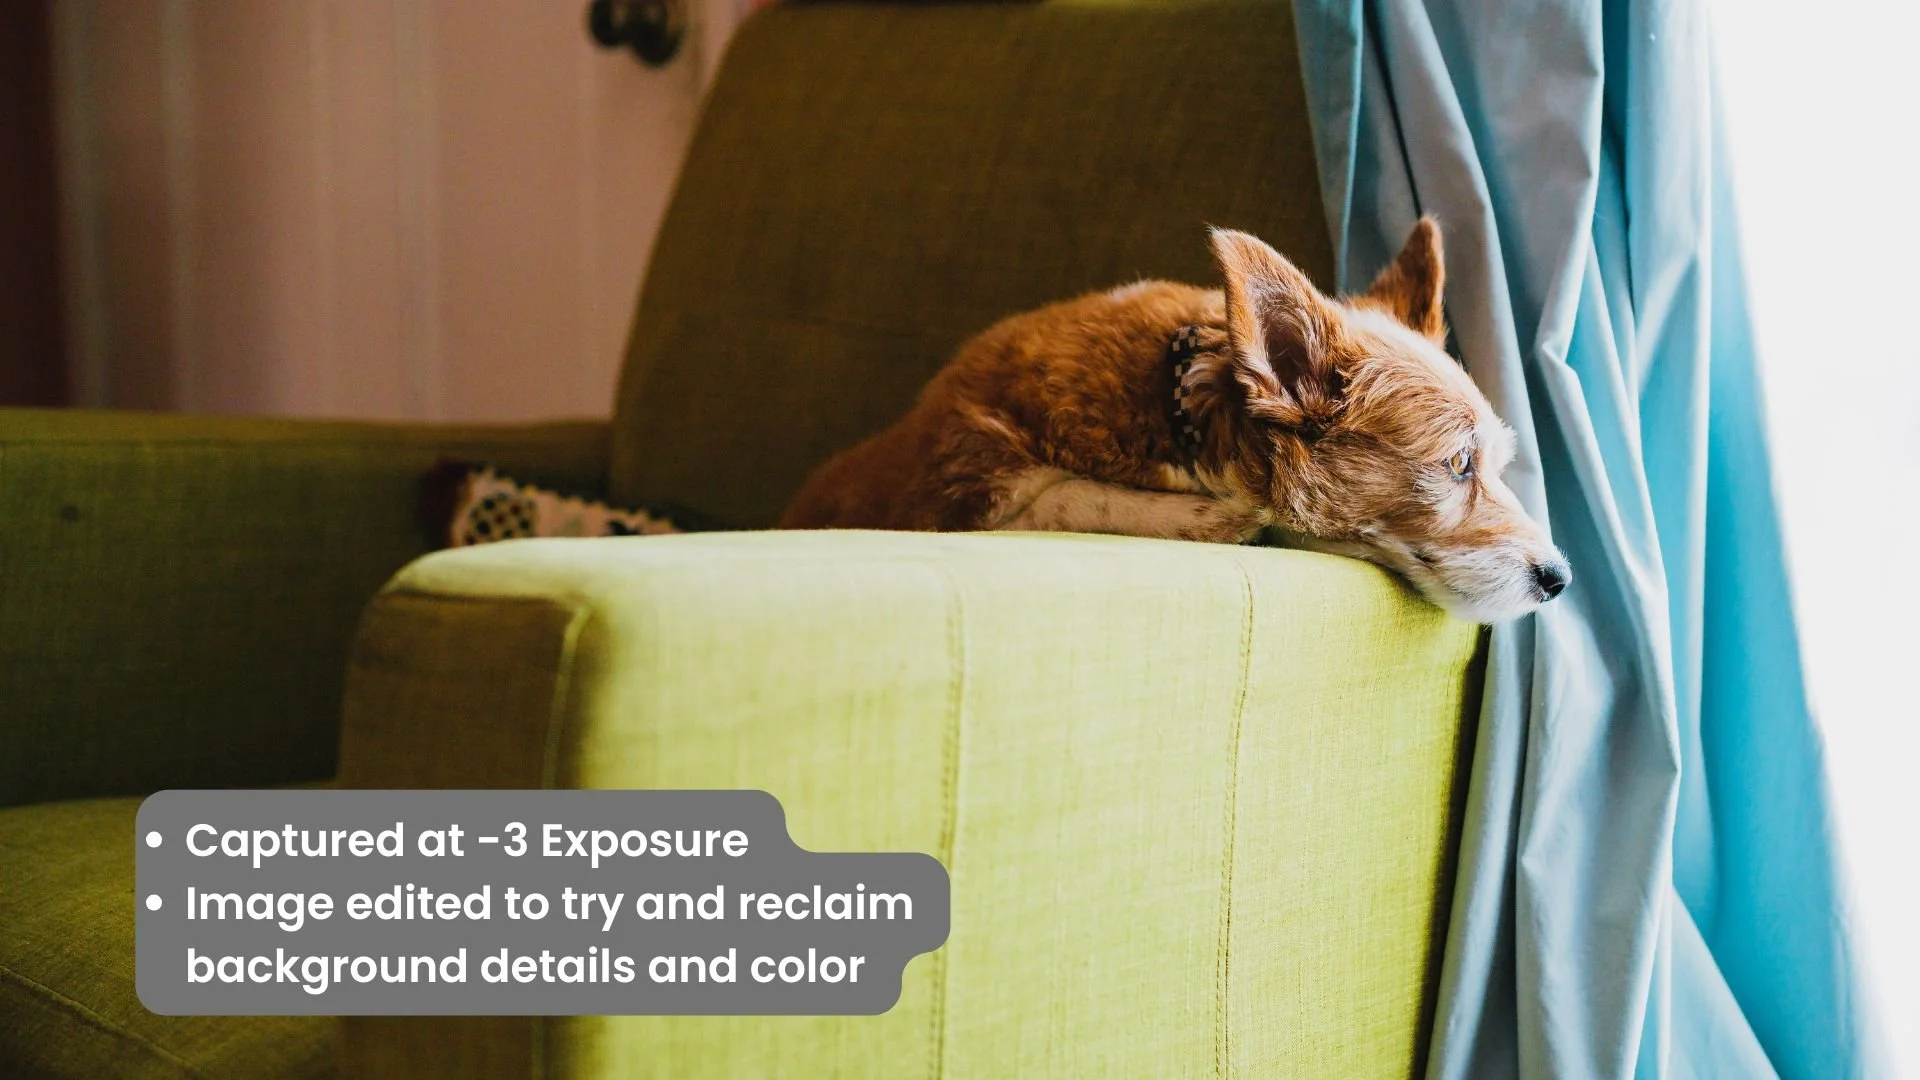
Here’s a visual example of what that looks like in the small gallery below featuring my Corgi/Poodle/Gremlin puppy dog, Leeloo Dallas Multipass.
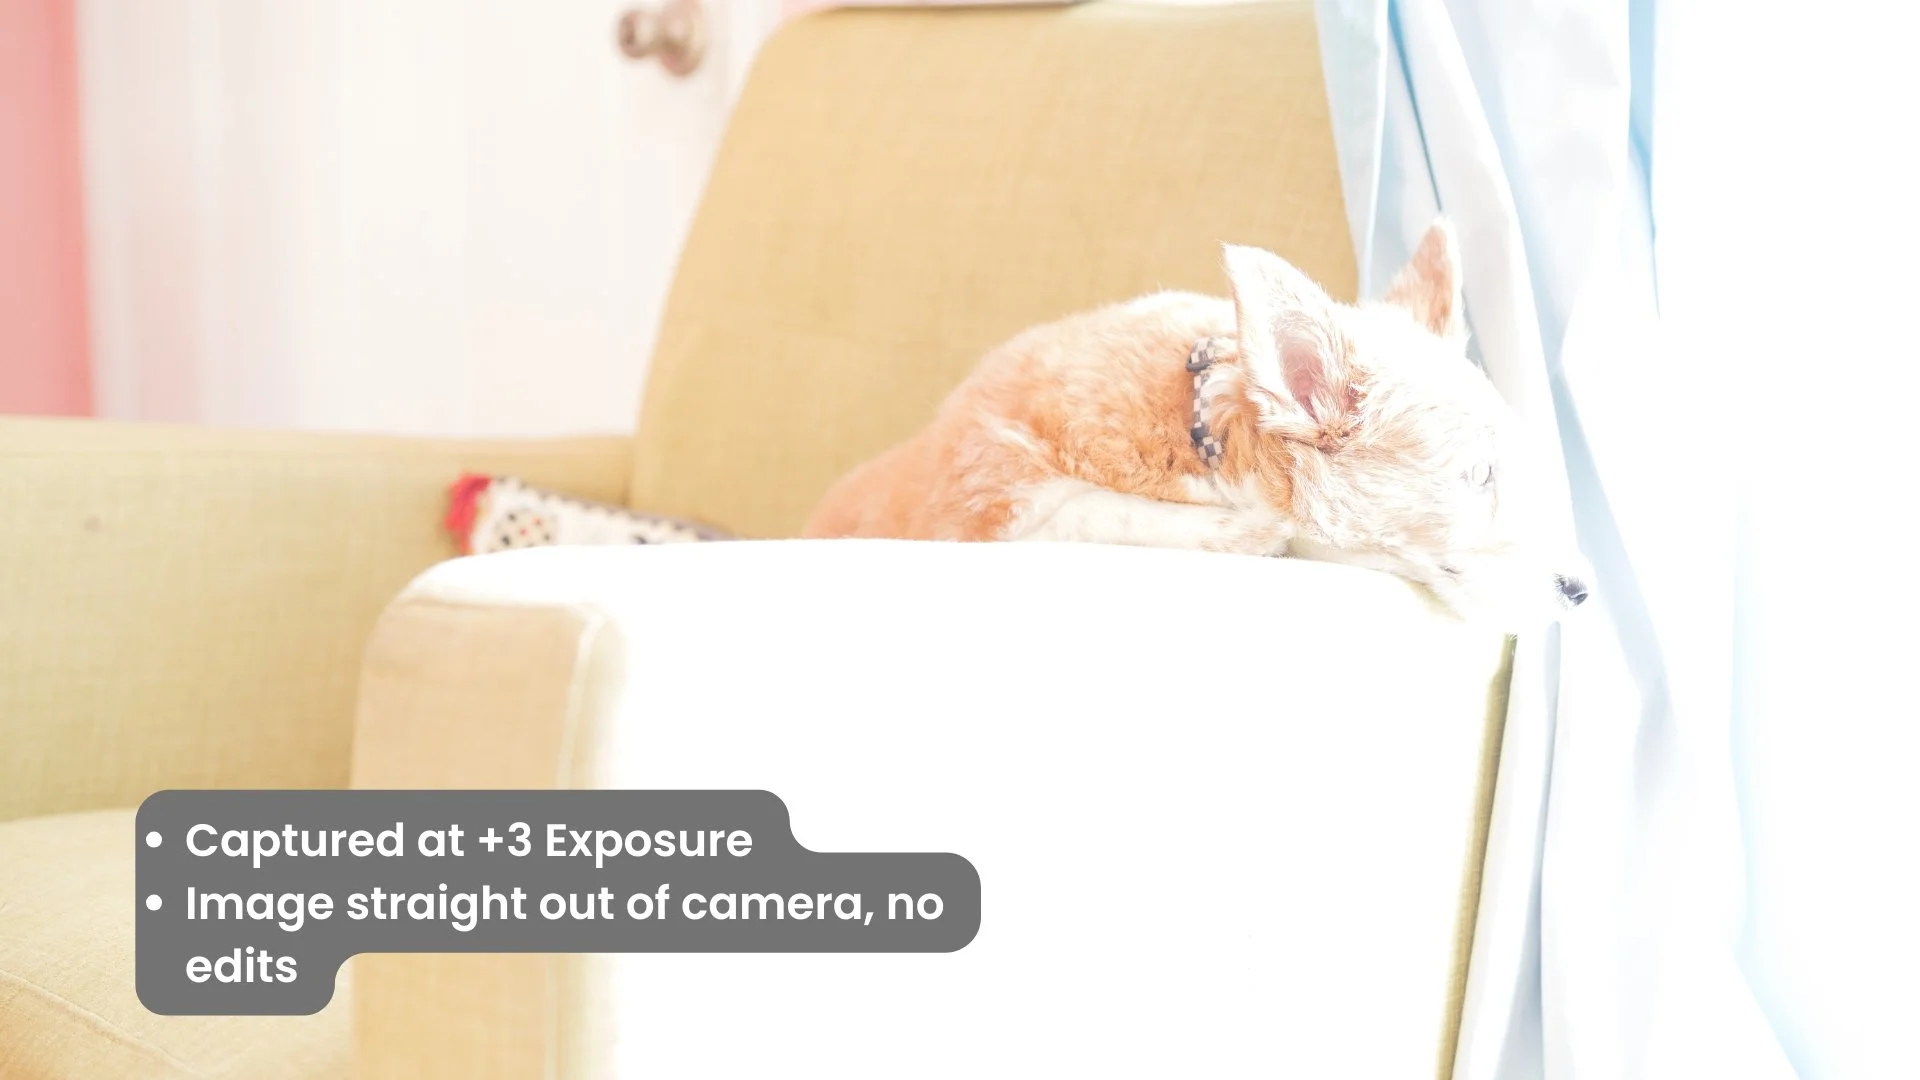
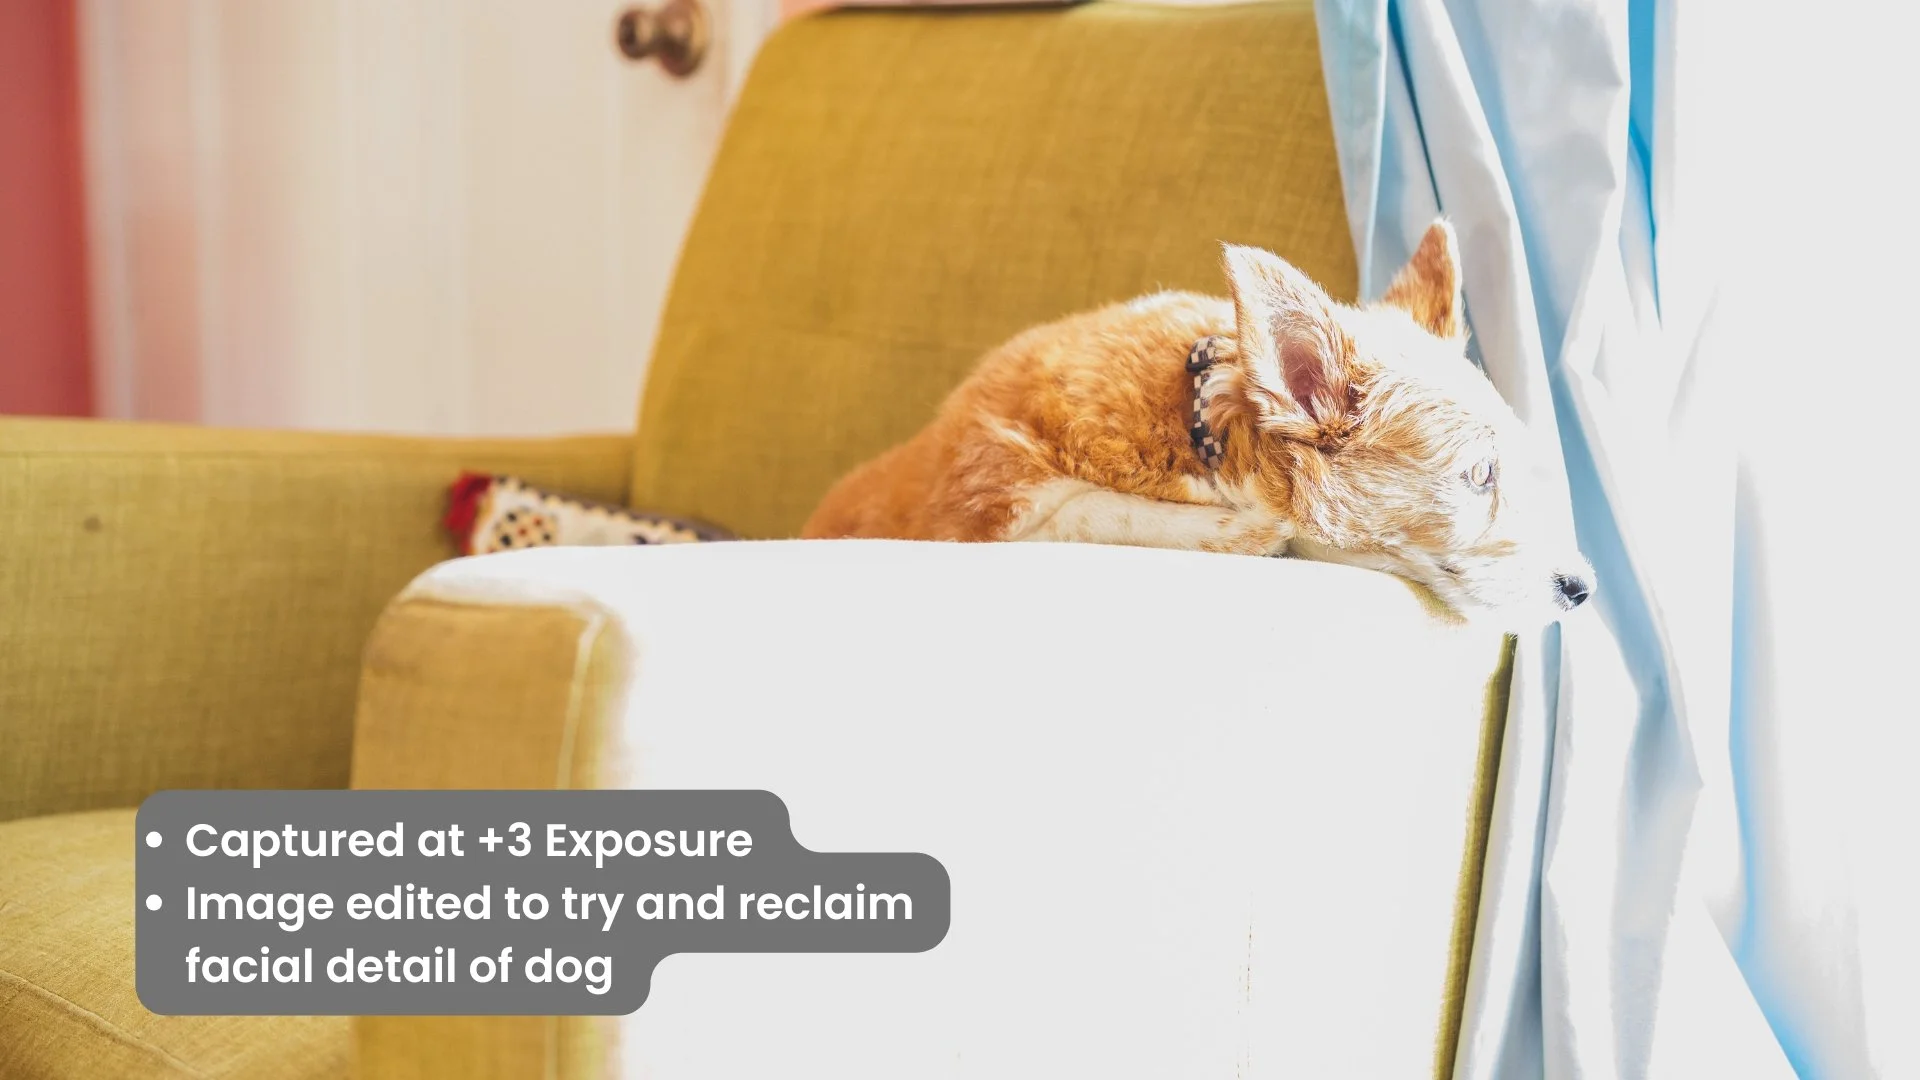
Notice in the left picture, that even when I tried to lower the brightness settings of the image in my editing software that the facial details of my dog, Leeloo, could NOT be recovered. Even if the rest of the entire image was entirely black, her face would still be a white blob because at +3 exposure there simply is ZERO data in her face for Lightroom (my photo editing software of choice) to pull from. Just to drive my point home even further, here’s even a screen capture of my editing software with all of the brightness sliders turned all the way down!

Alternatively, I was able to recover PLENTY of details from the photo captured at -3 Exposure. As you can see by comparing the two images below, there is PLENTY of detail that can be pulled from those inky shadows. In fact, I could have recovered even MORE details and image data from the left side of the photo if I thought it would make the image look better, but I do think that leaving a little bit of shadow in that area does lend the image a bit more contrast.
Before I continue, allow me to ask a question that used to plague me when I was still starting out: “What does it mean for a part of a photo to be overexposed? Or underexposed? Isn’t photography an art form? And aren’t art forms subjective? Why is everyone always smugly talking about these things in such objective terms? What are you people talking about!”
You know…that’s a great topic for its own blog post. And so, once I’ve written that out, I’ll provide a link for it here: (sorry, not available yet 😊)
It Ain’t Throwin’ Shade to Put Someone IN the Shade
Photography is ALL about lighting. Did you know that? Of course you did!
And so when I say, “Put that subject in the shade!”, it perhaps sounds counter-intuitive. But! Consider that unless that spot in the shade is LITERALLY pitch black, that it IS actually full of light. And in fact, it’s often filled with light that can be described as soft and complimentary towards your photo subject once you’ve adjusted your exposure settings to fit the situation.
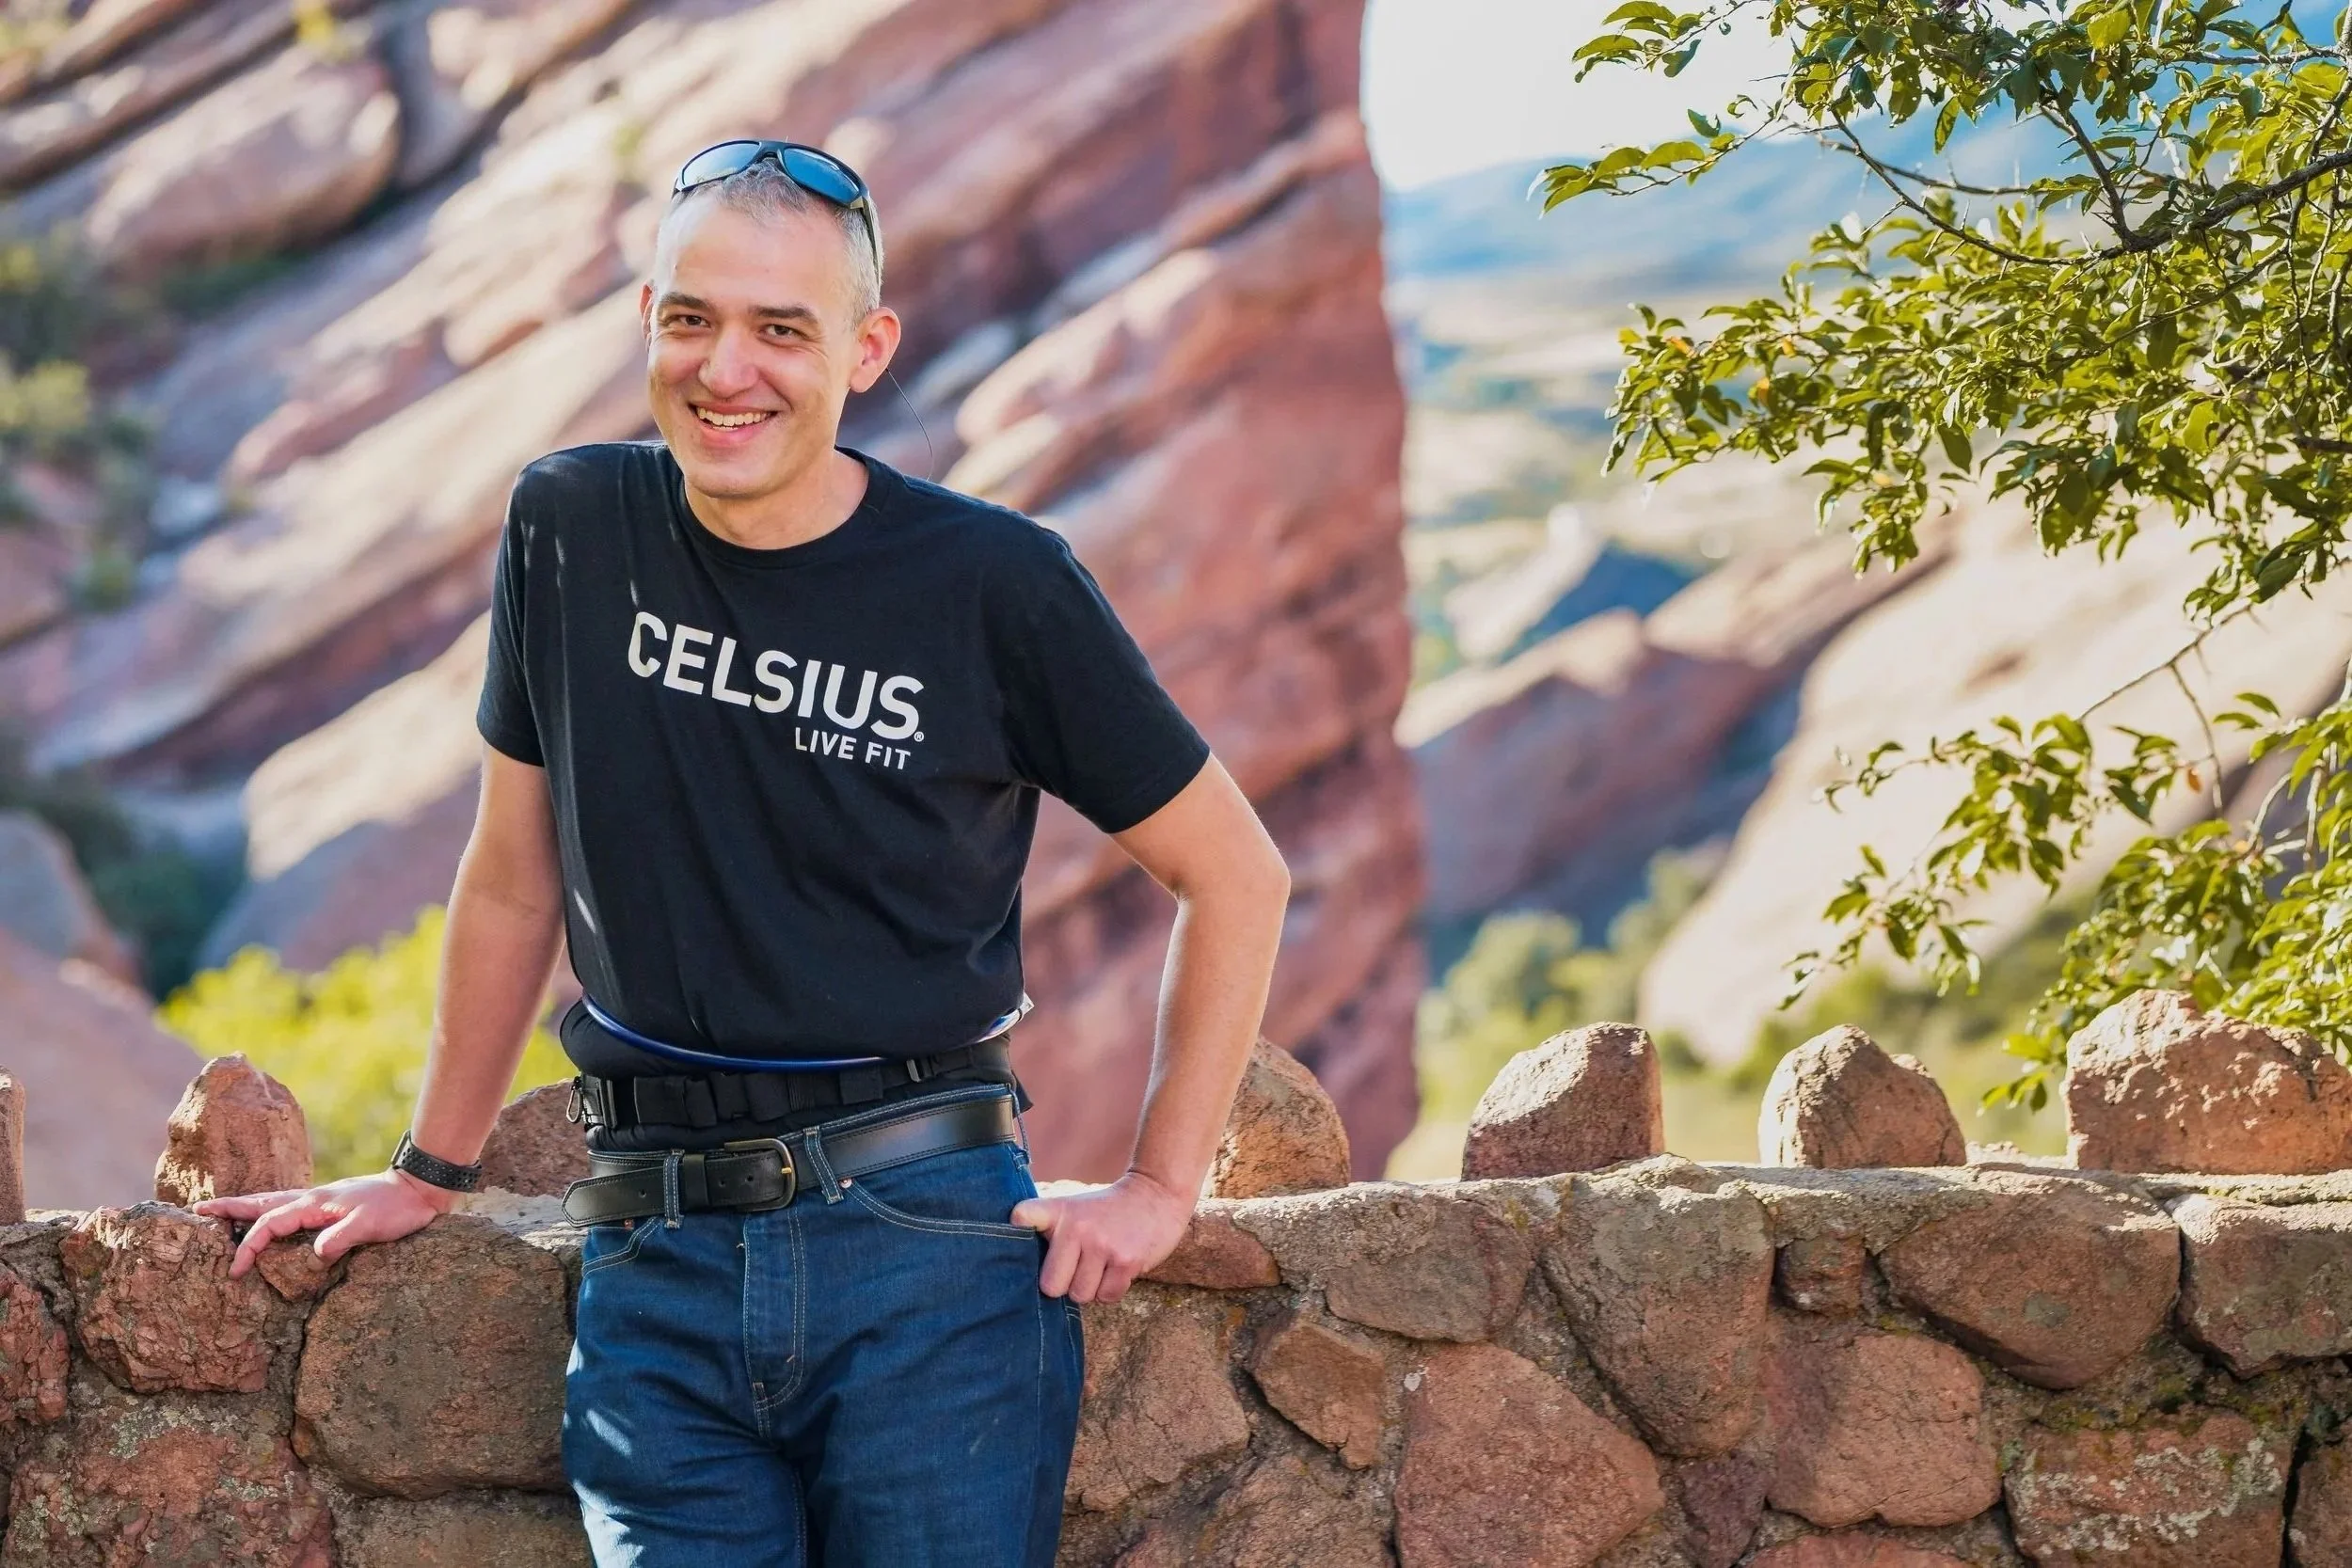
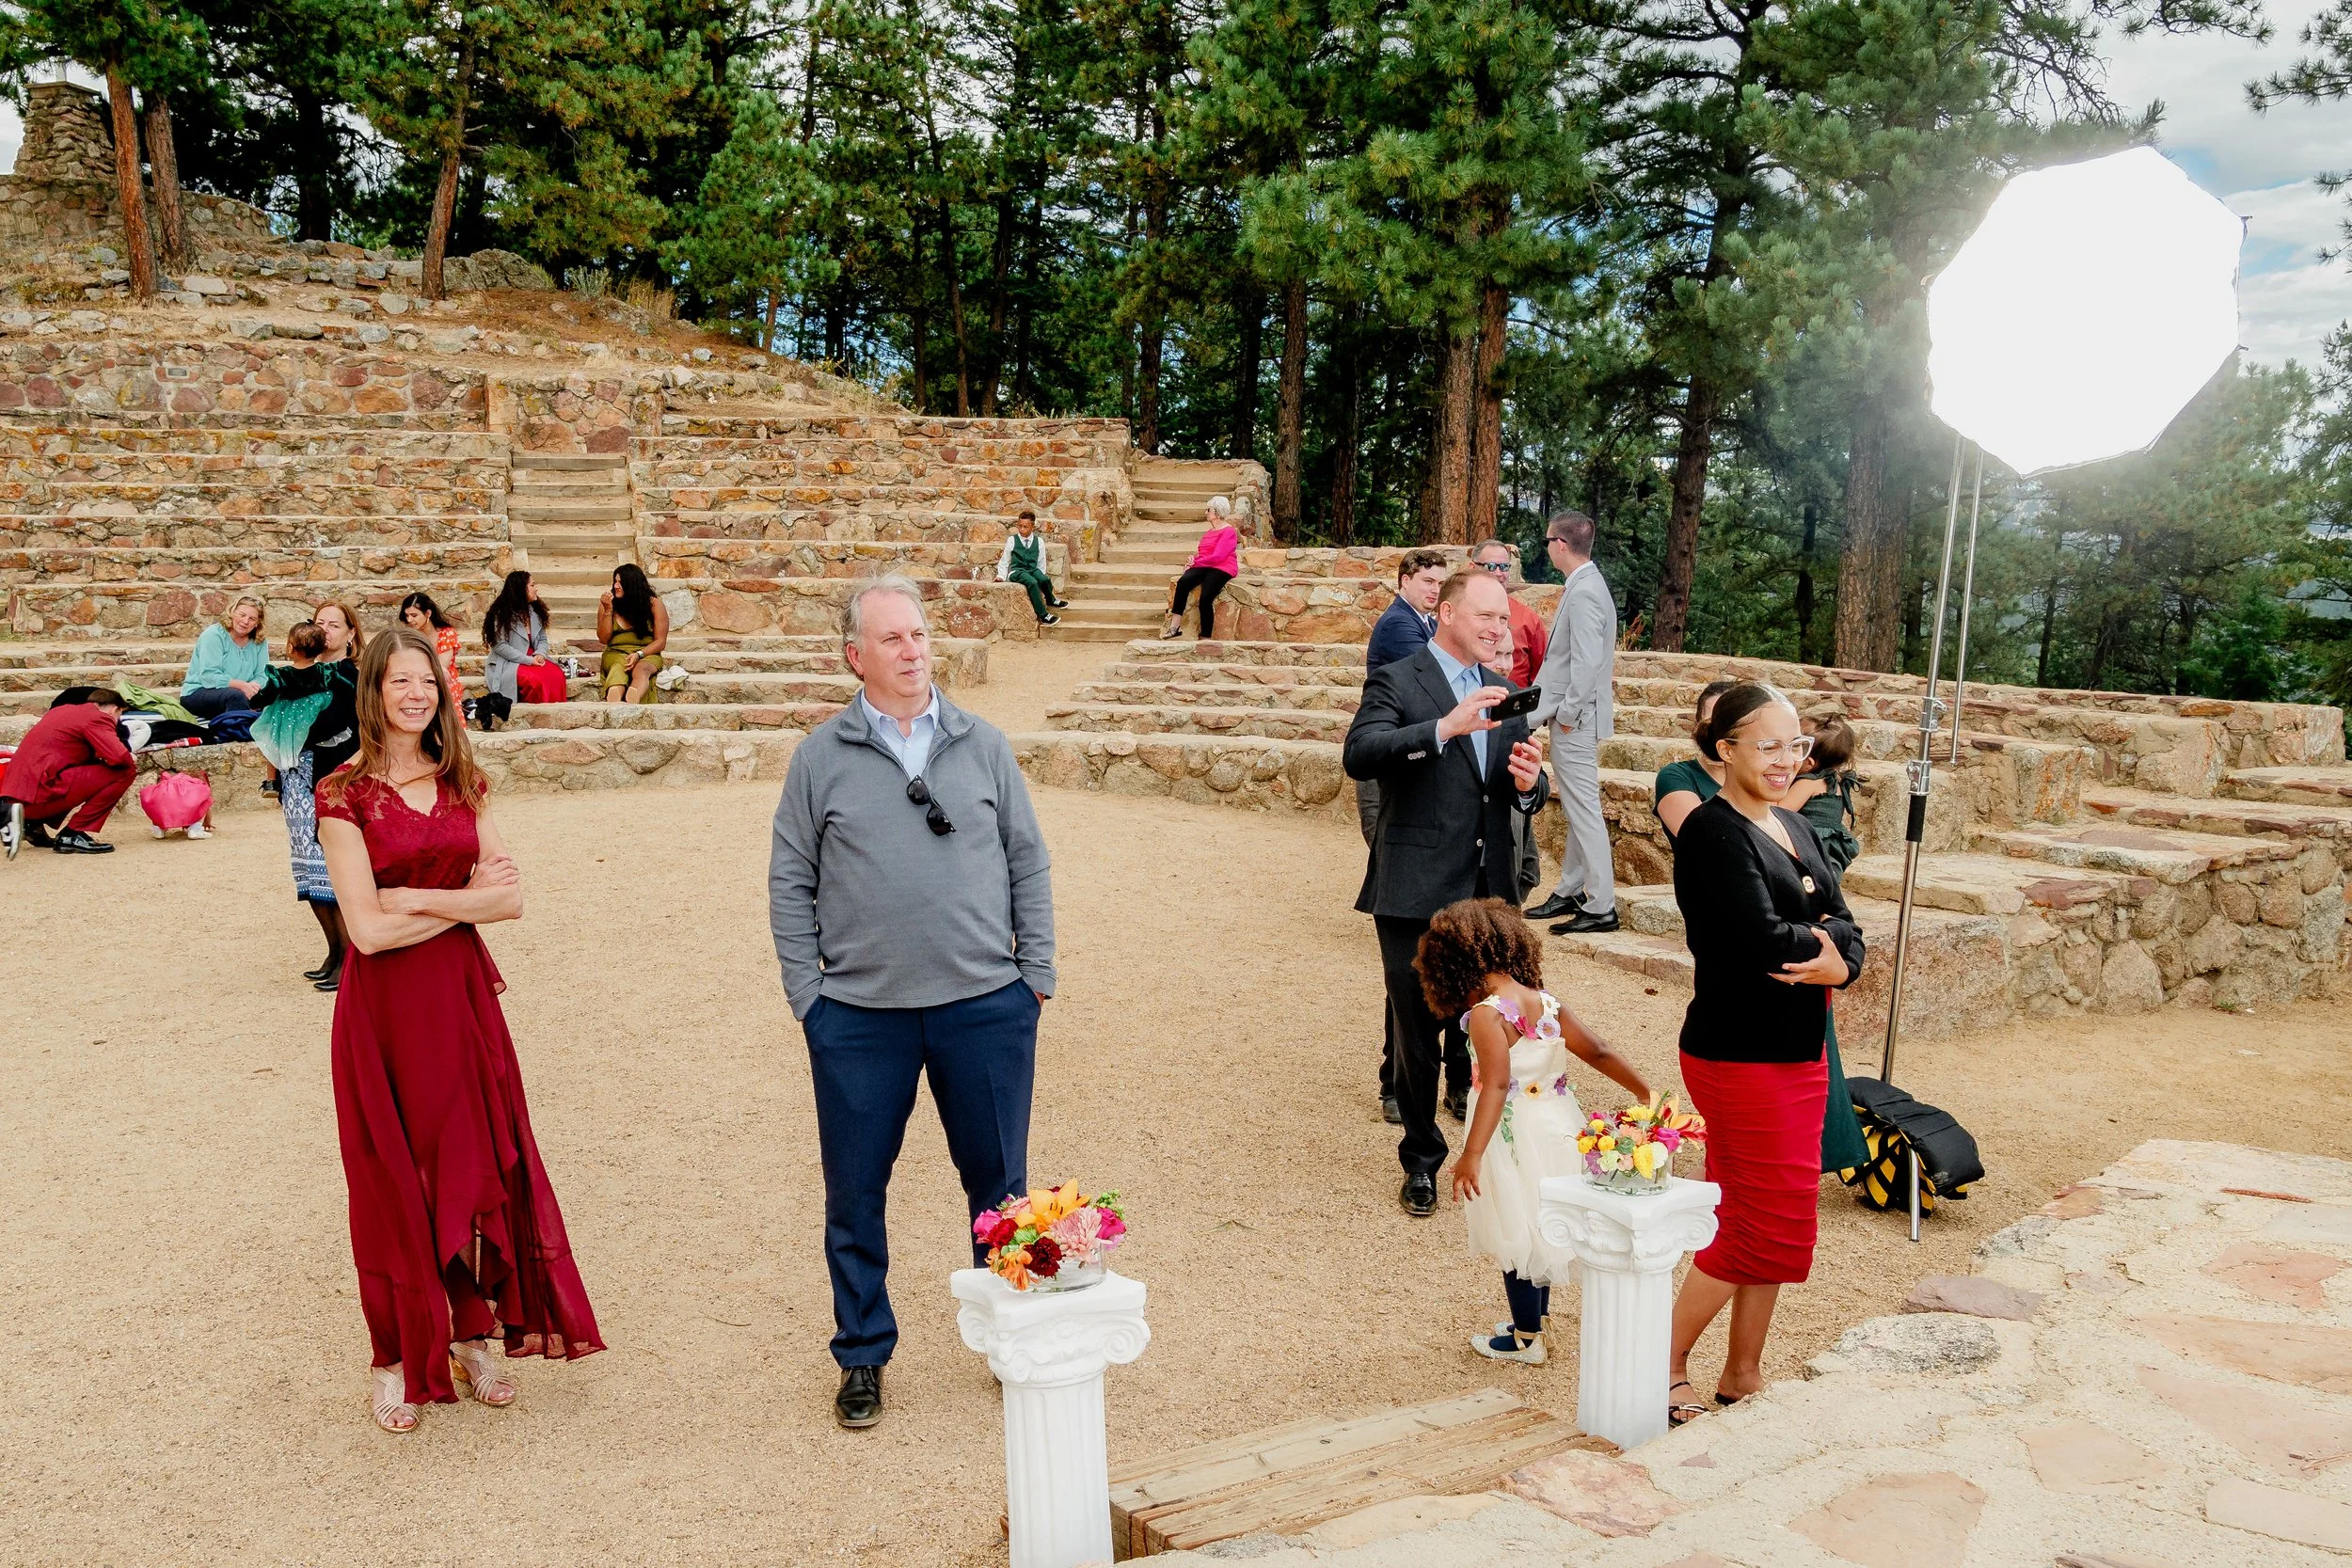
Gotta love a photo portrait session at Red Rocks!
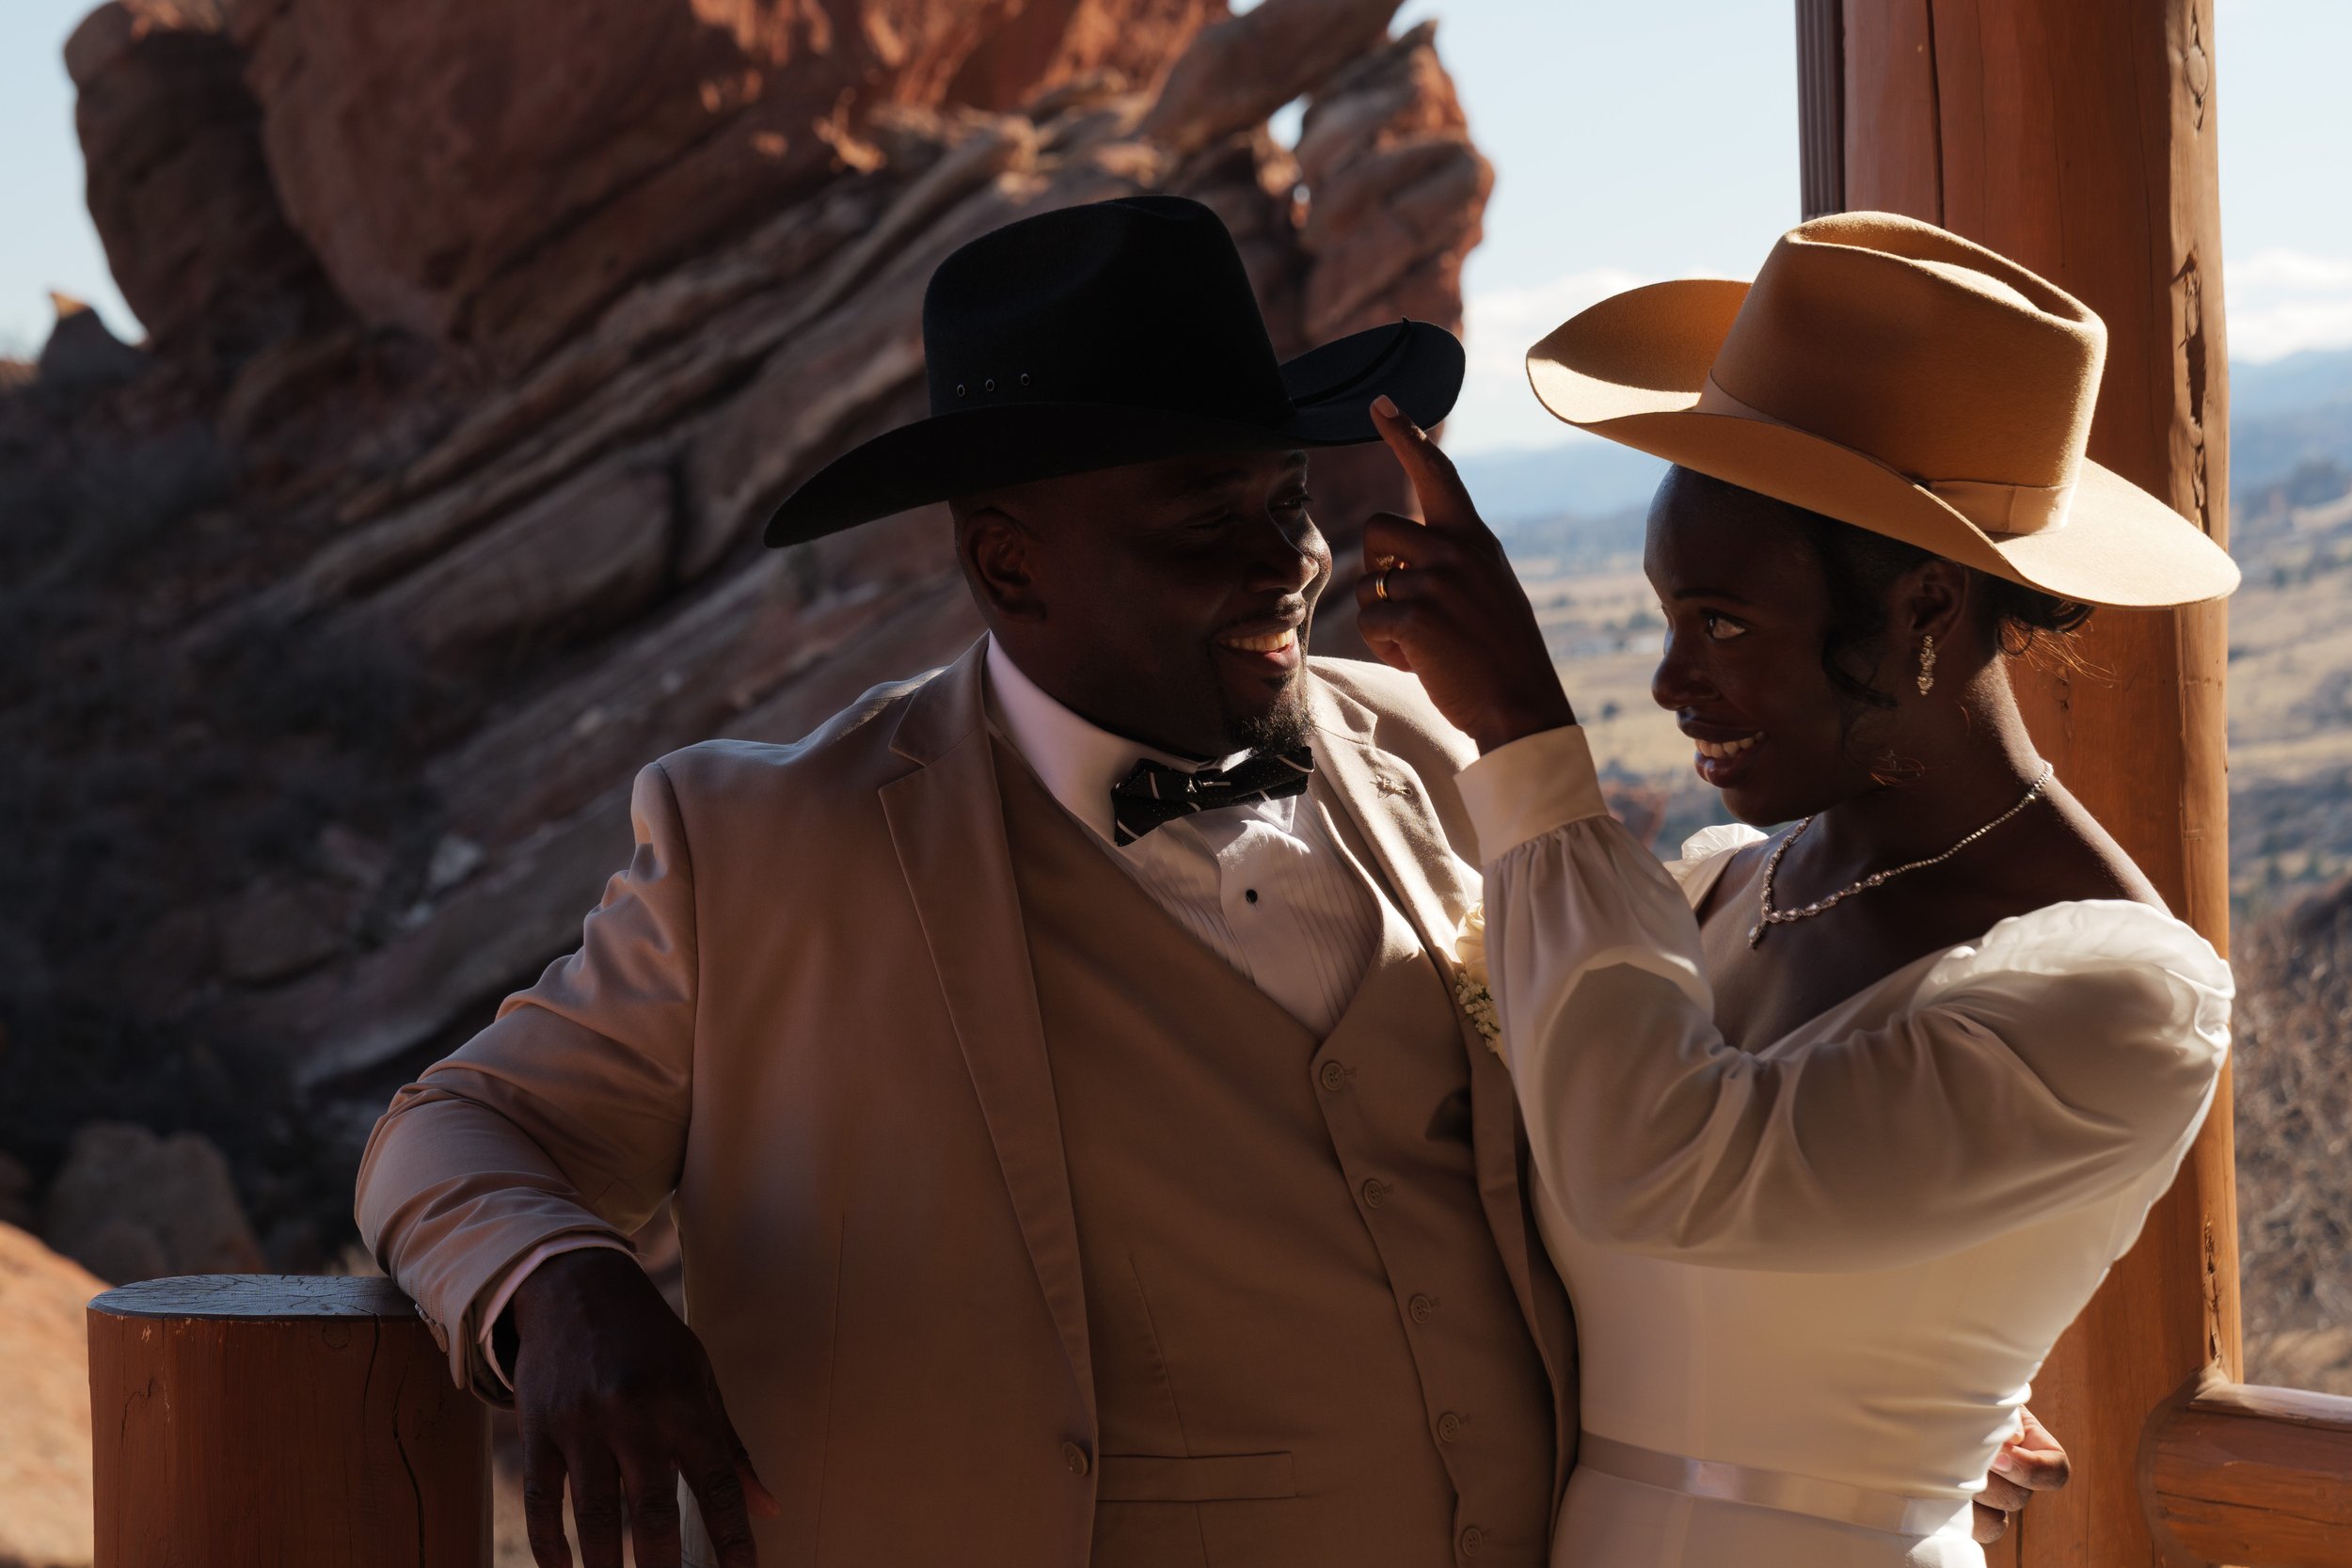
And, failing that, don’t forget that even if your image DOES come out underexposed you can still recover plenty of details from the shadows during the editing process. Just look at this BEFORE and AFTER example from an Elopement I was hired to photograph.


Or, even better, place your subject at the edge of a shady spot, right near where the lighting begins. If you angle your subject just right, you’ll find that you’ve now given your subject some interesting definition now that they’ve been accommodated with a gradient of soft lighting and slightly harder lighting rather than a singular strength of light.

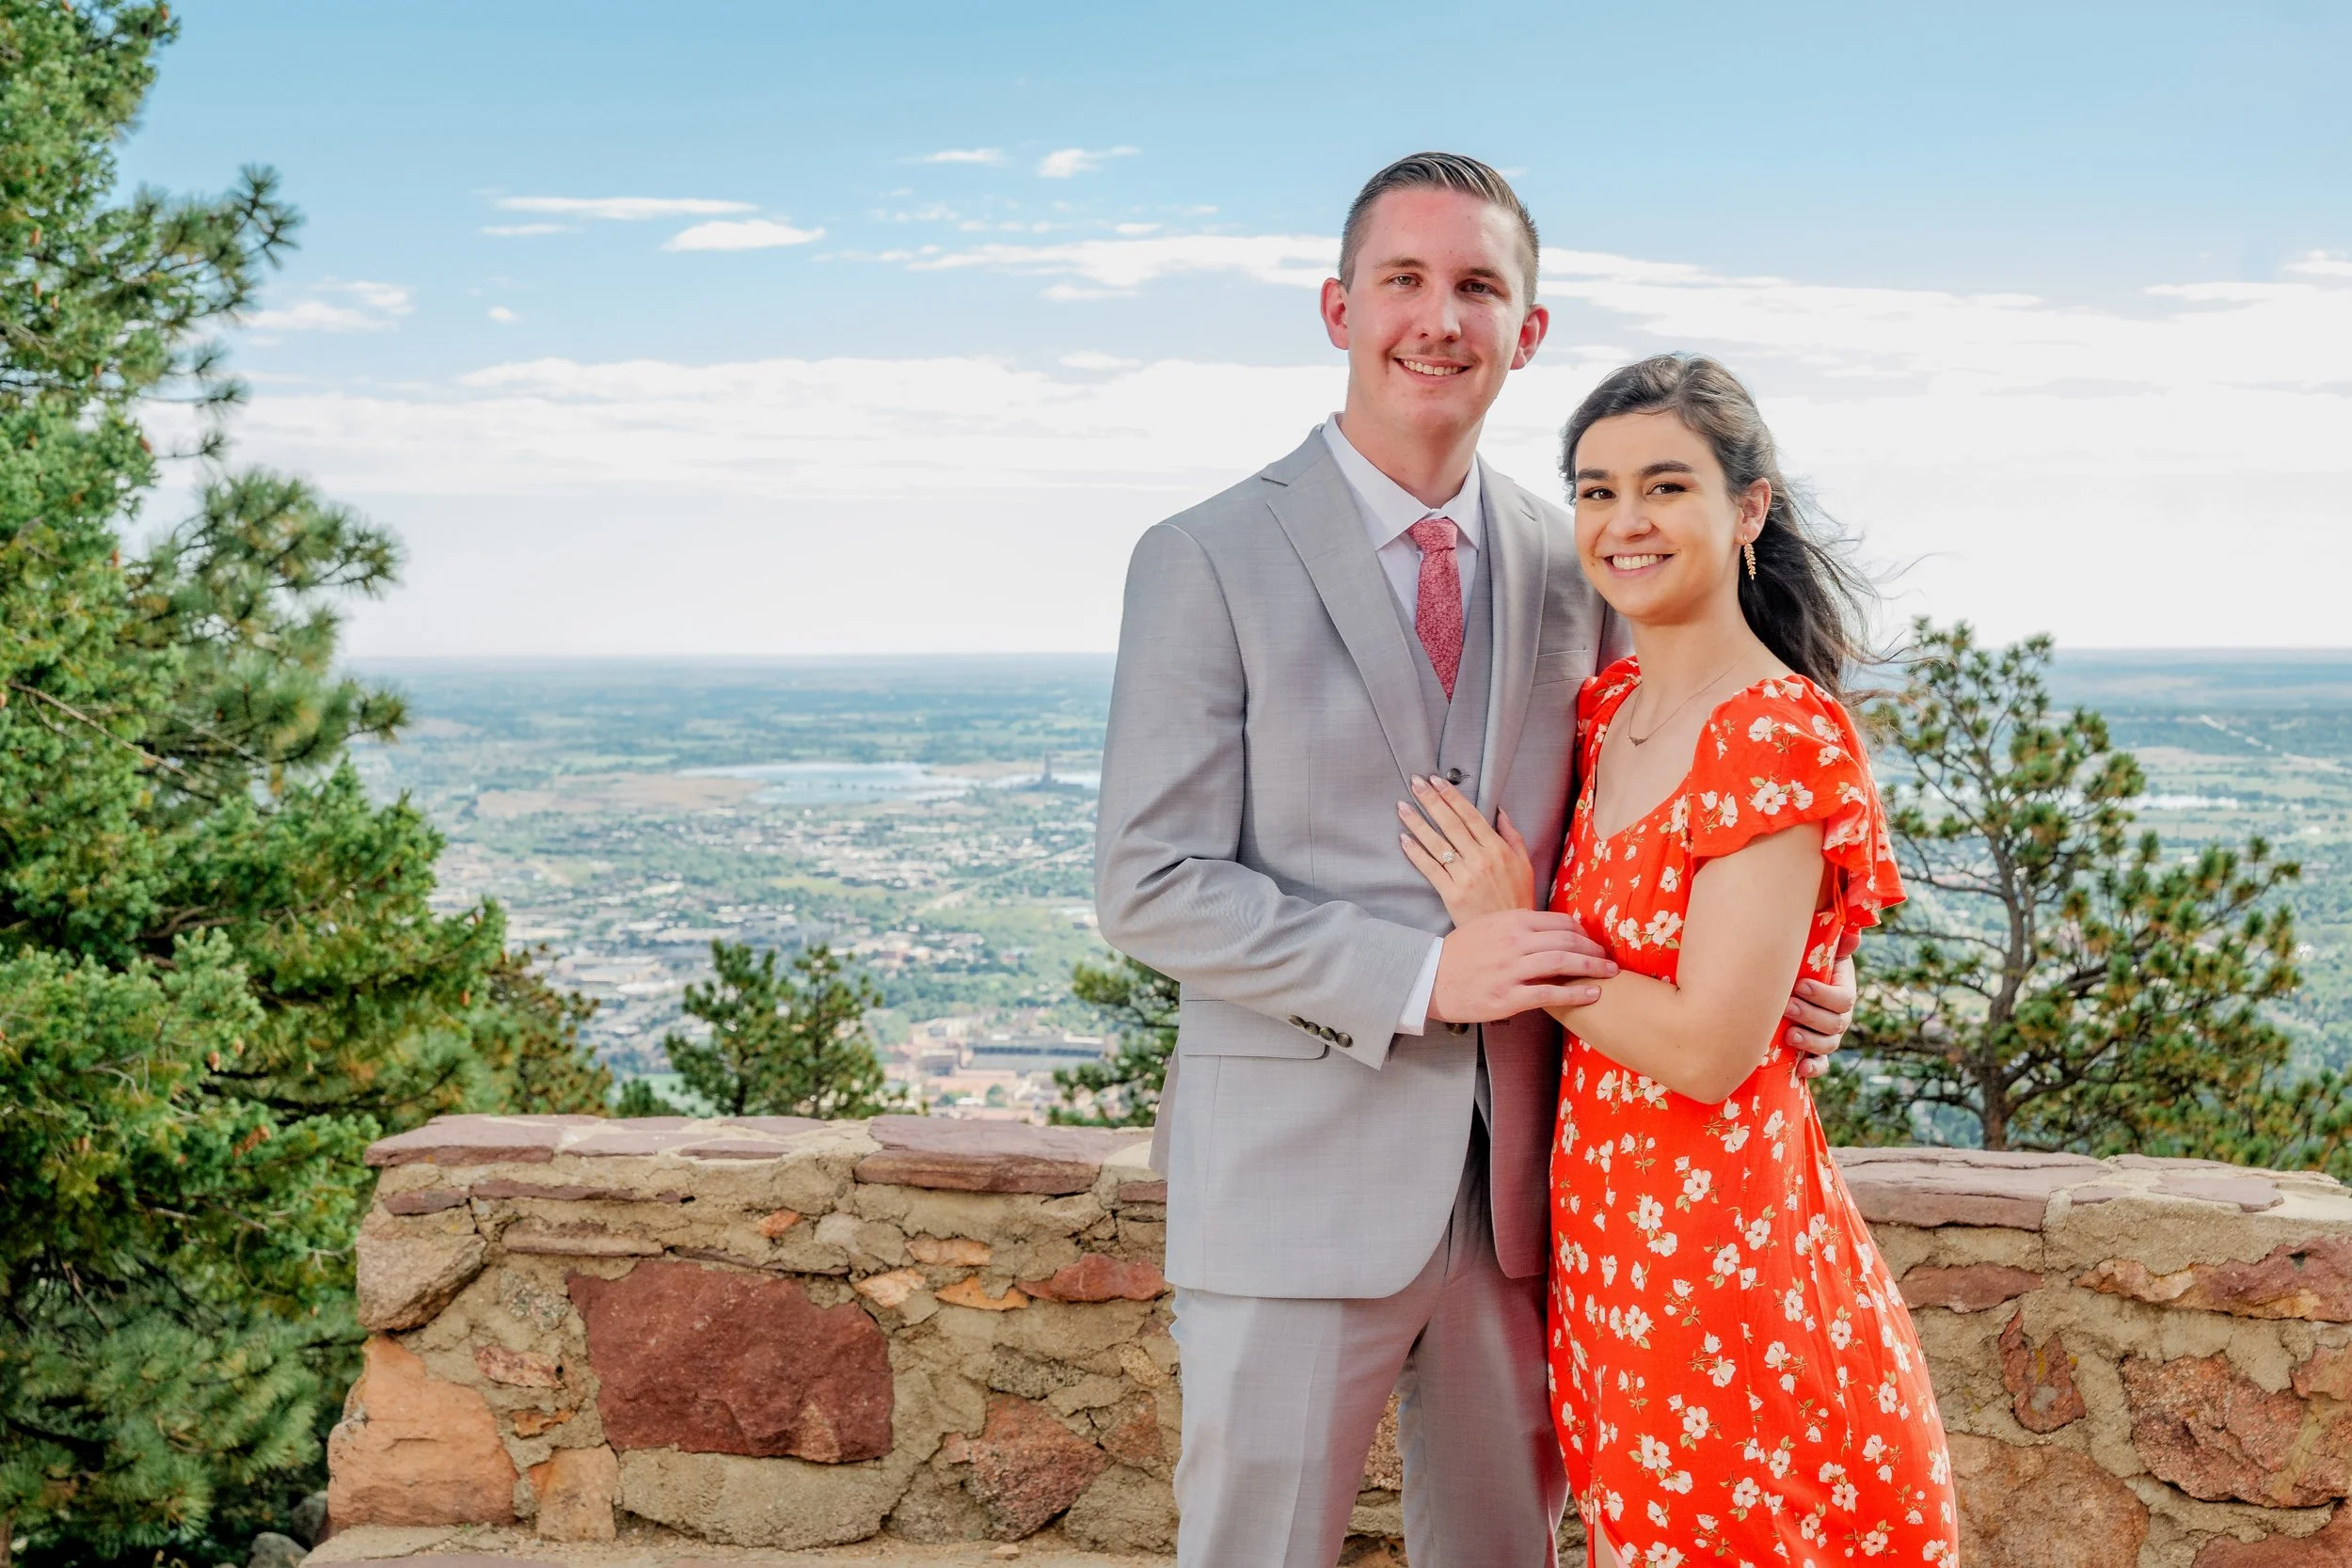
Another example from Al and Jess’s elopement. Loved working with these two!
Much like you see in these photos here taken behind a maintenance shed at Red Rocks.
Now that might sound easy…but then you’d be surprised at how many event venues possess, like…ZERO SHADE. And in those cases, you’ll want to pull from the additional strategies listed below.
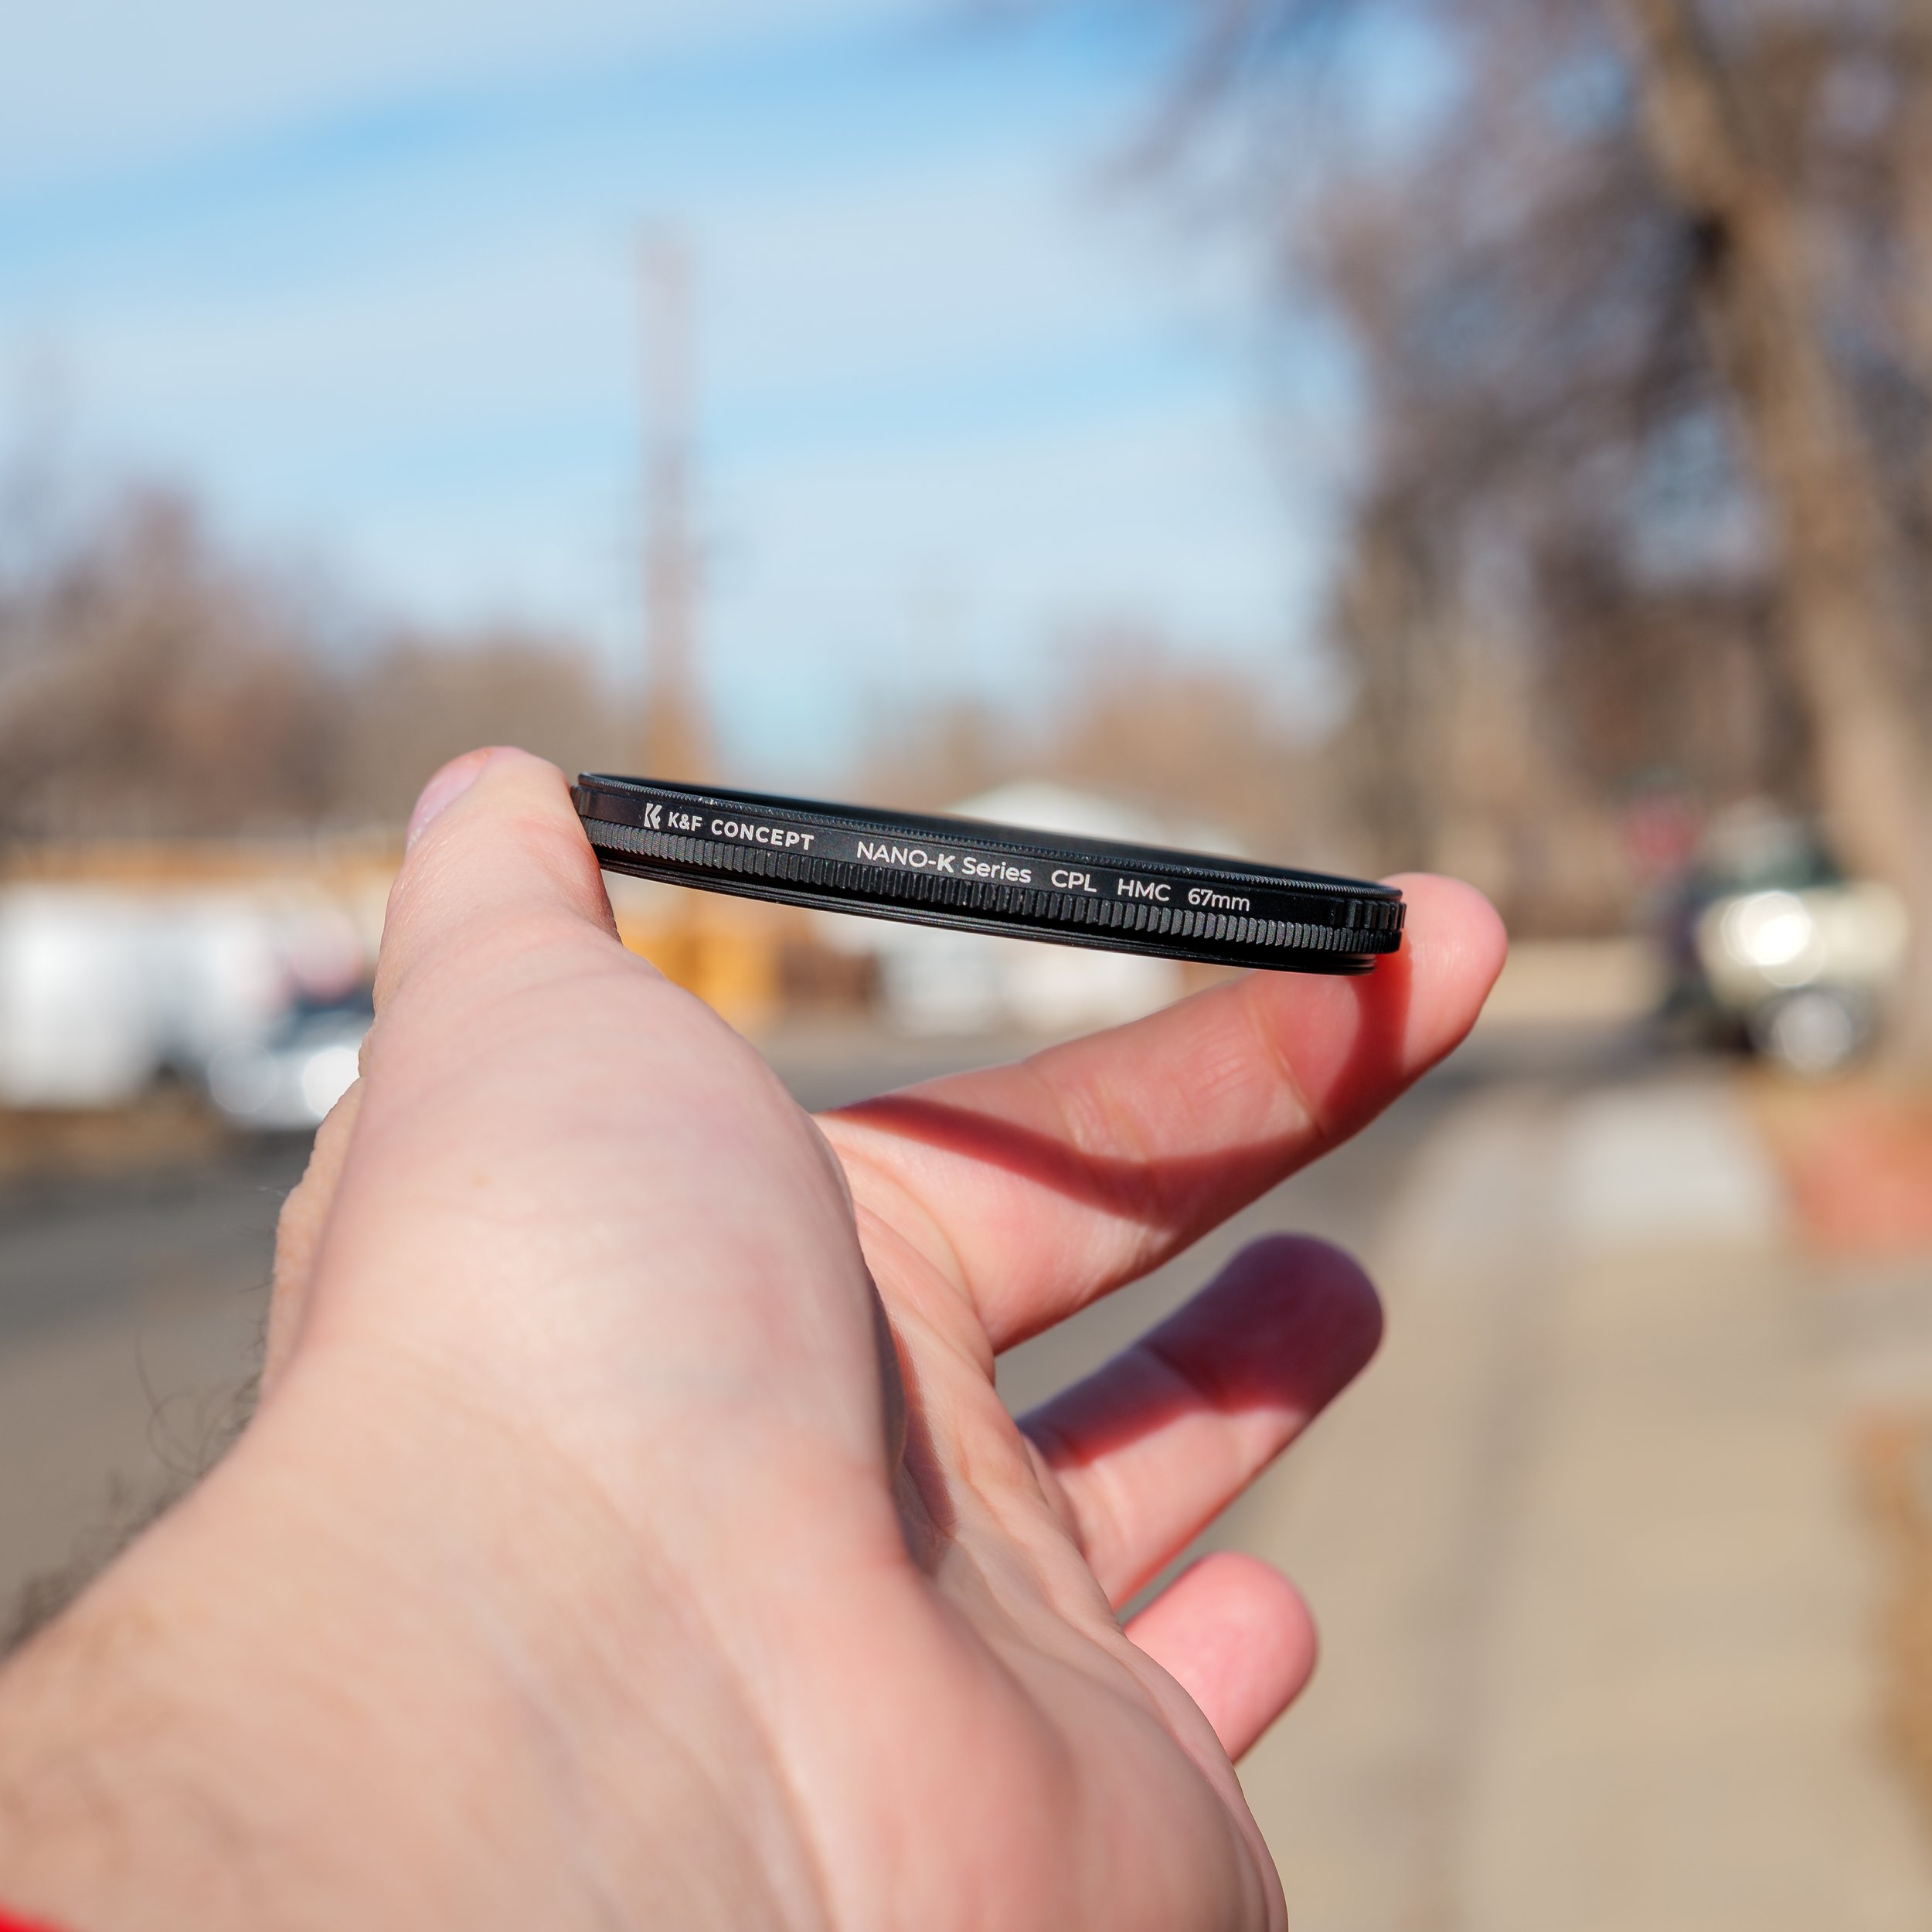
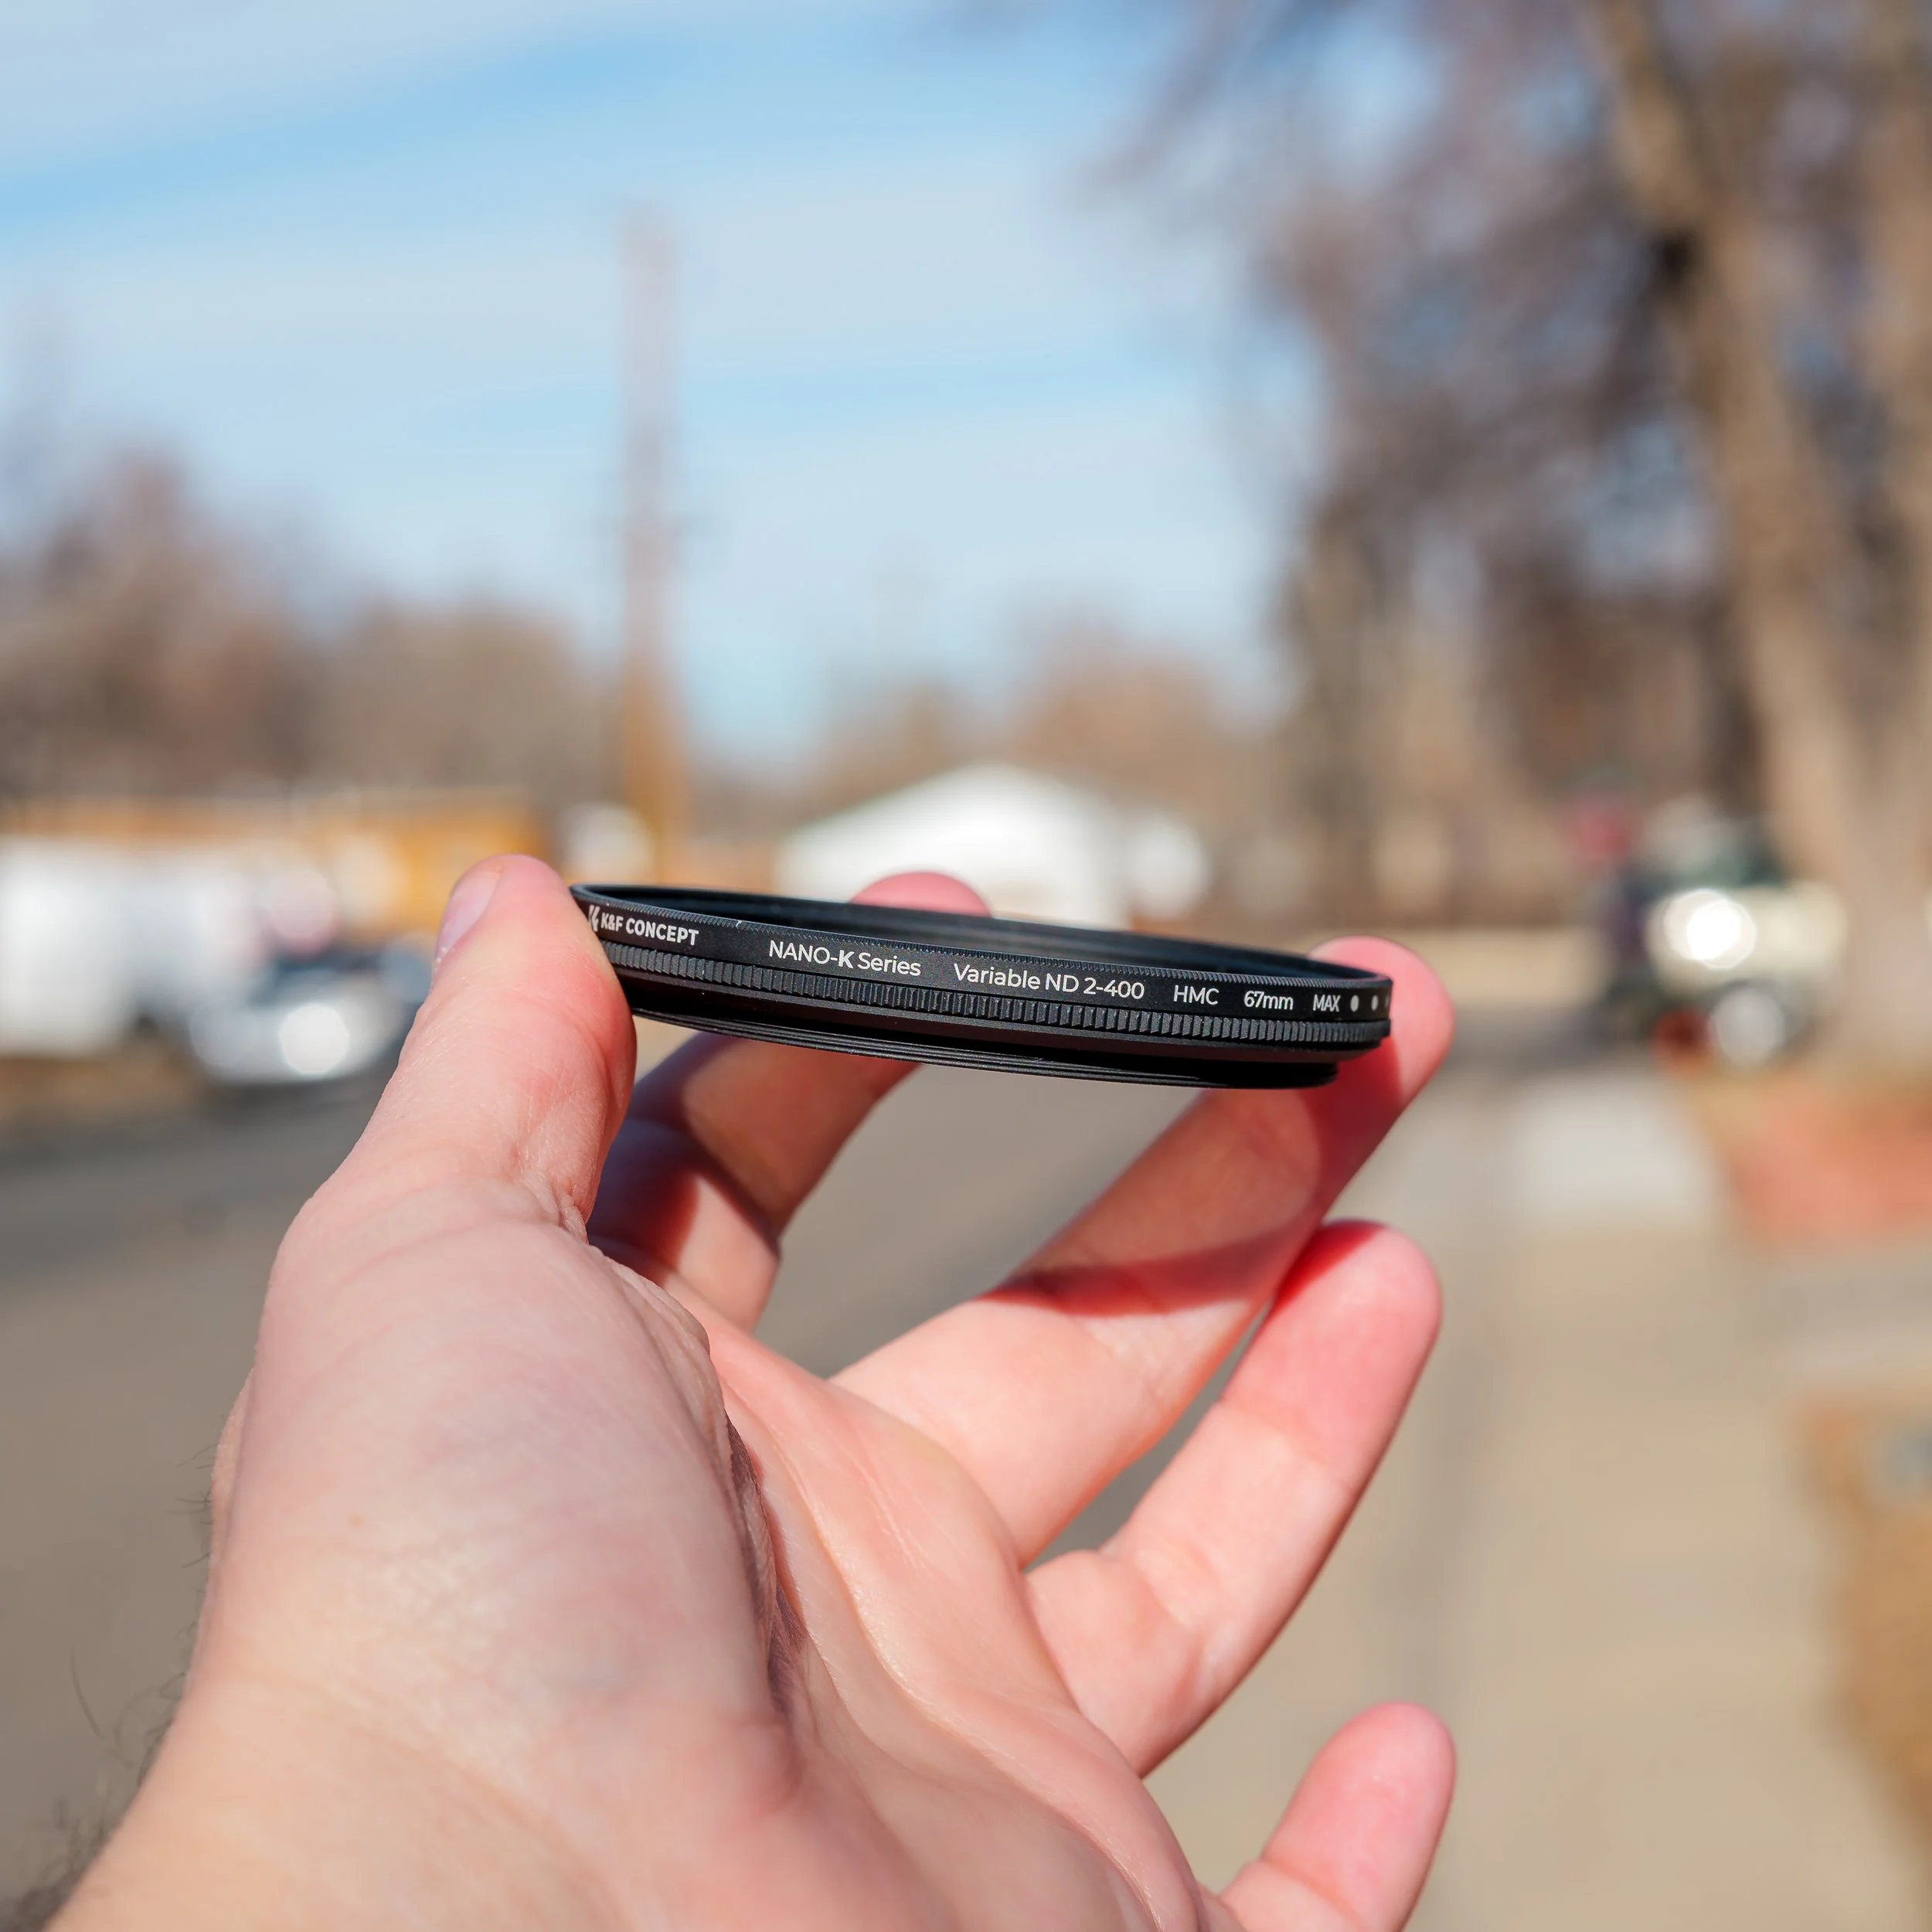
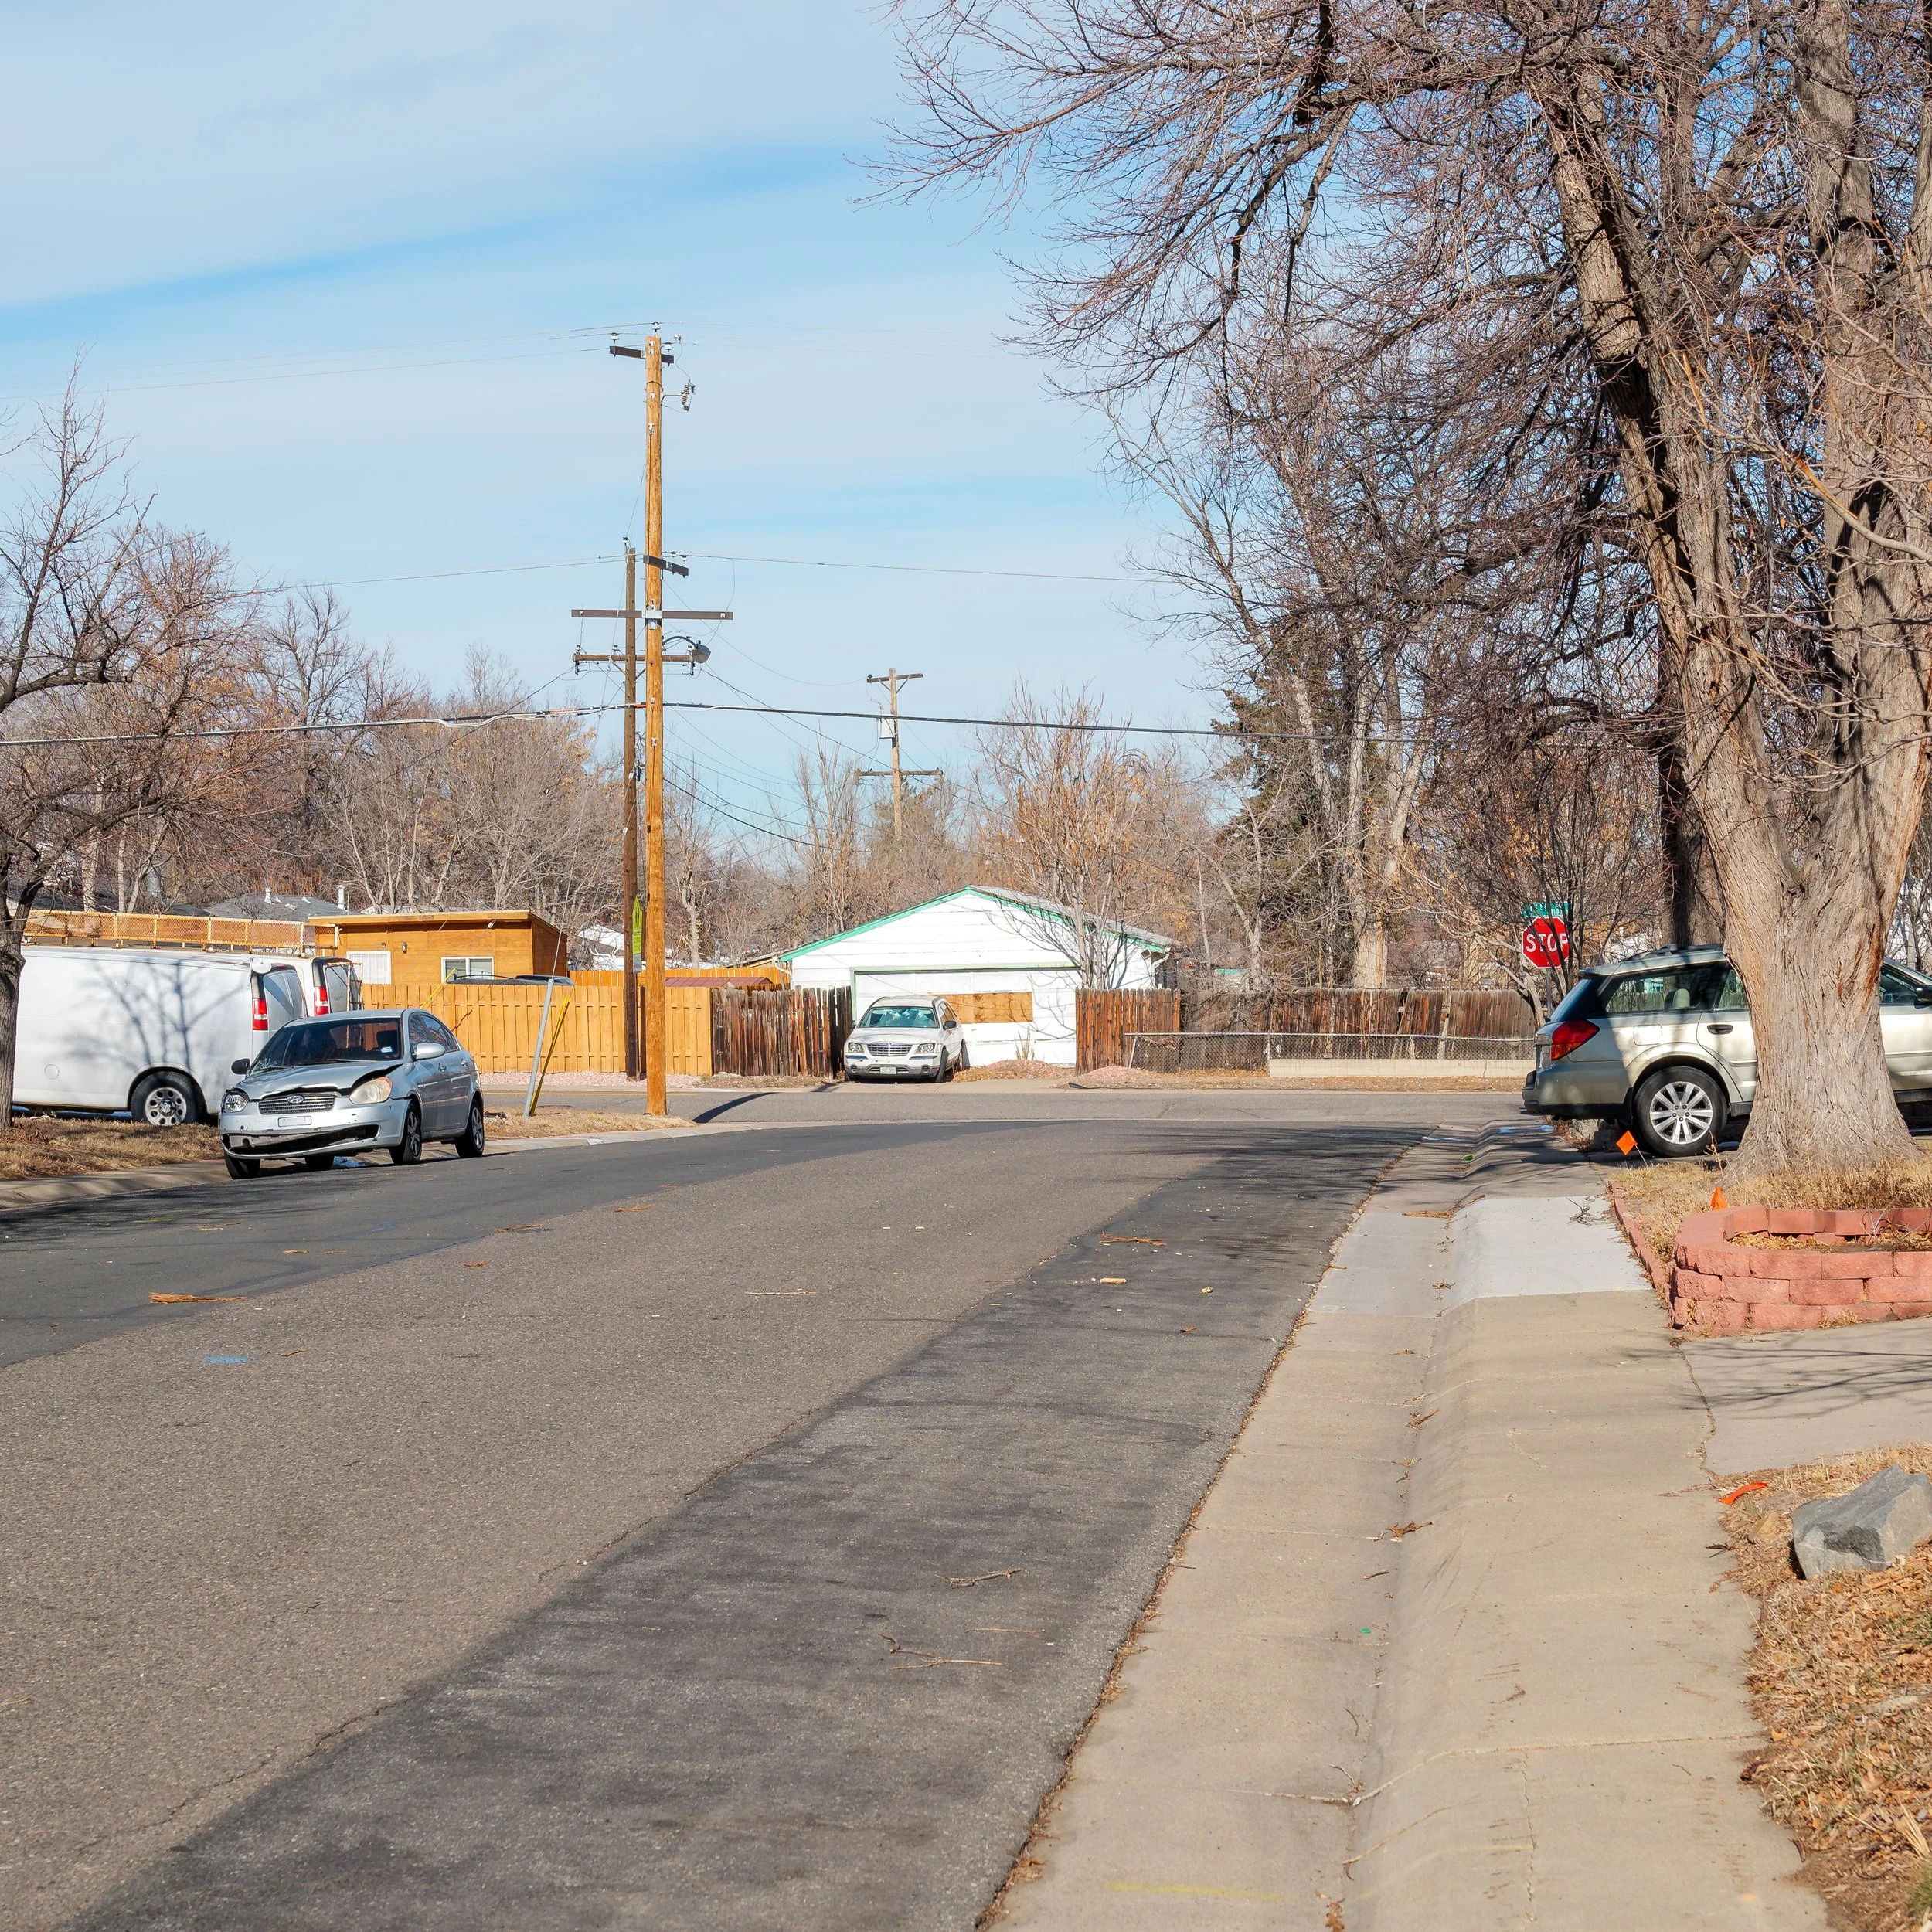
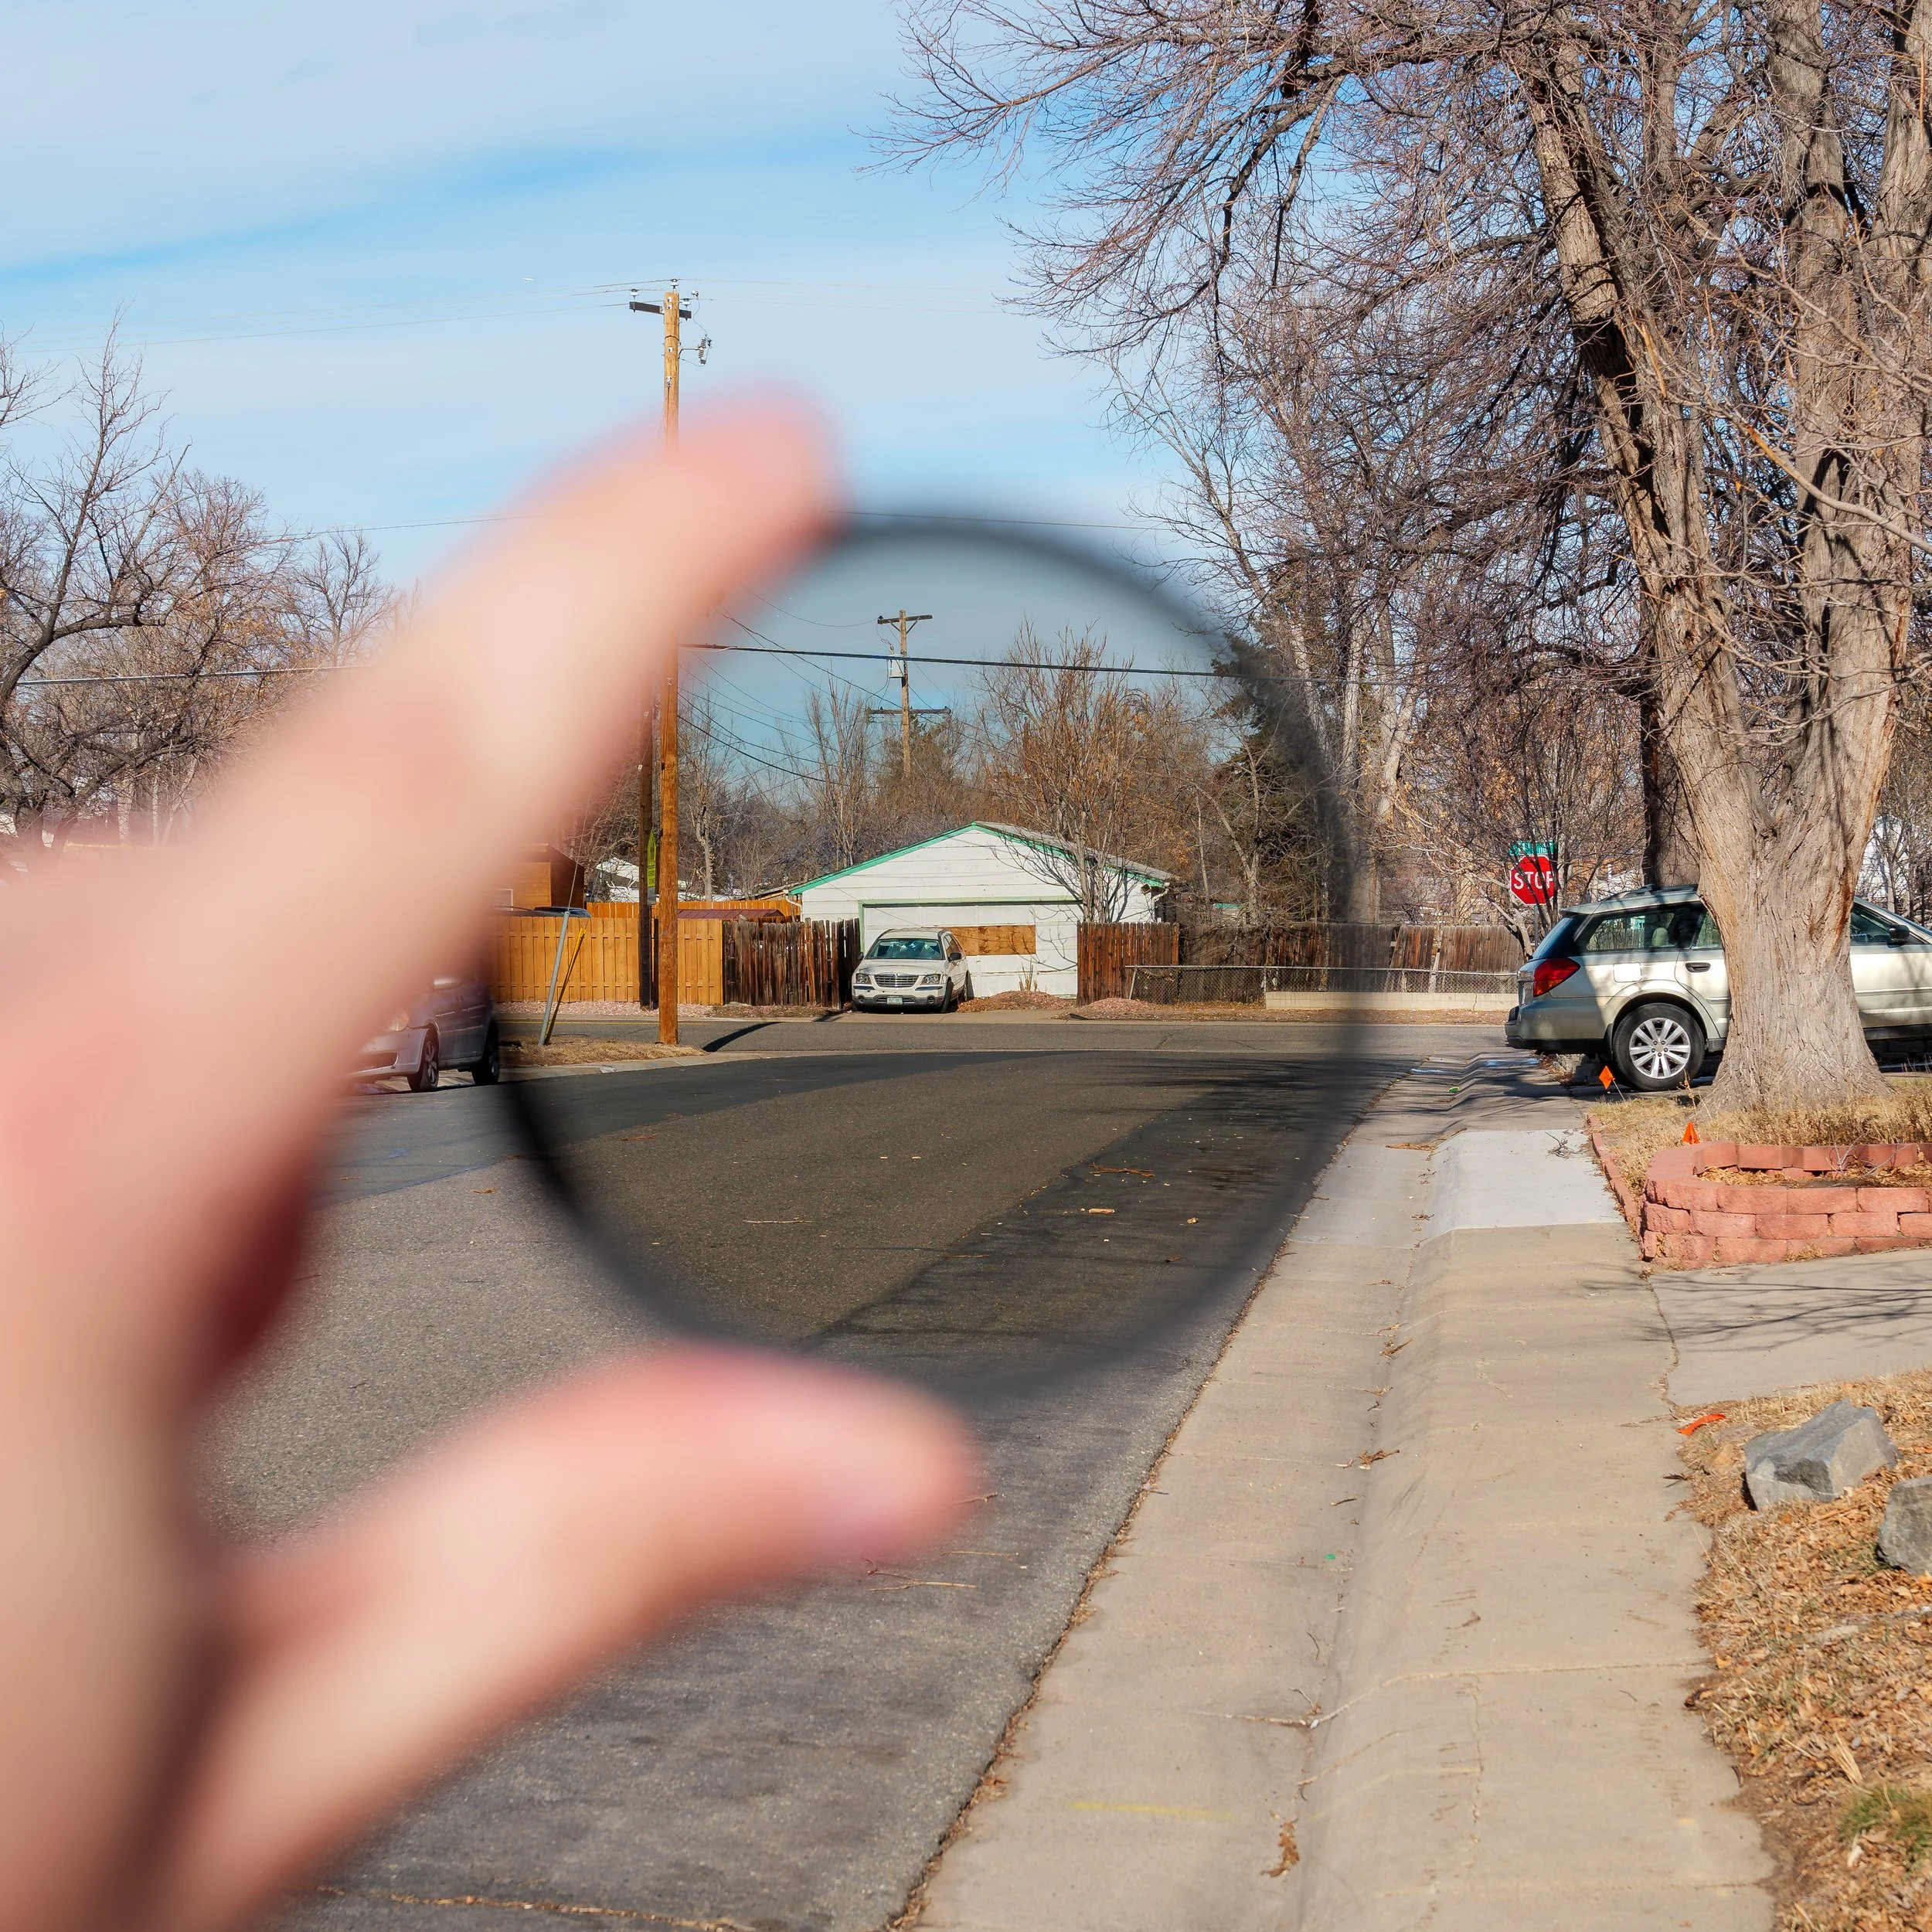
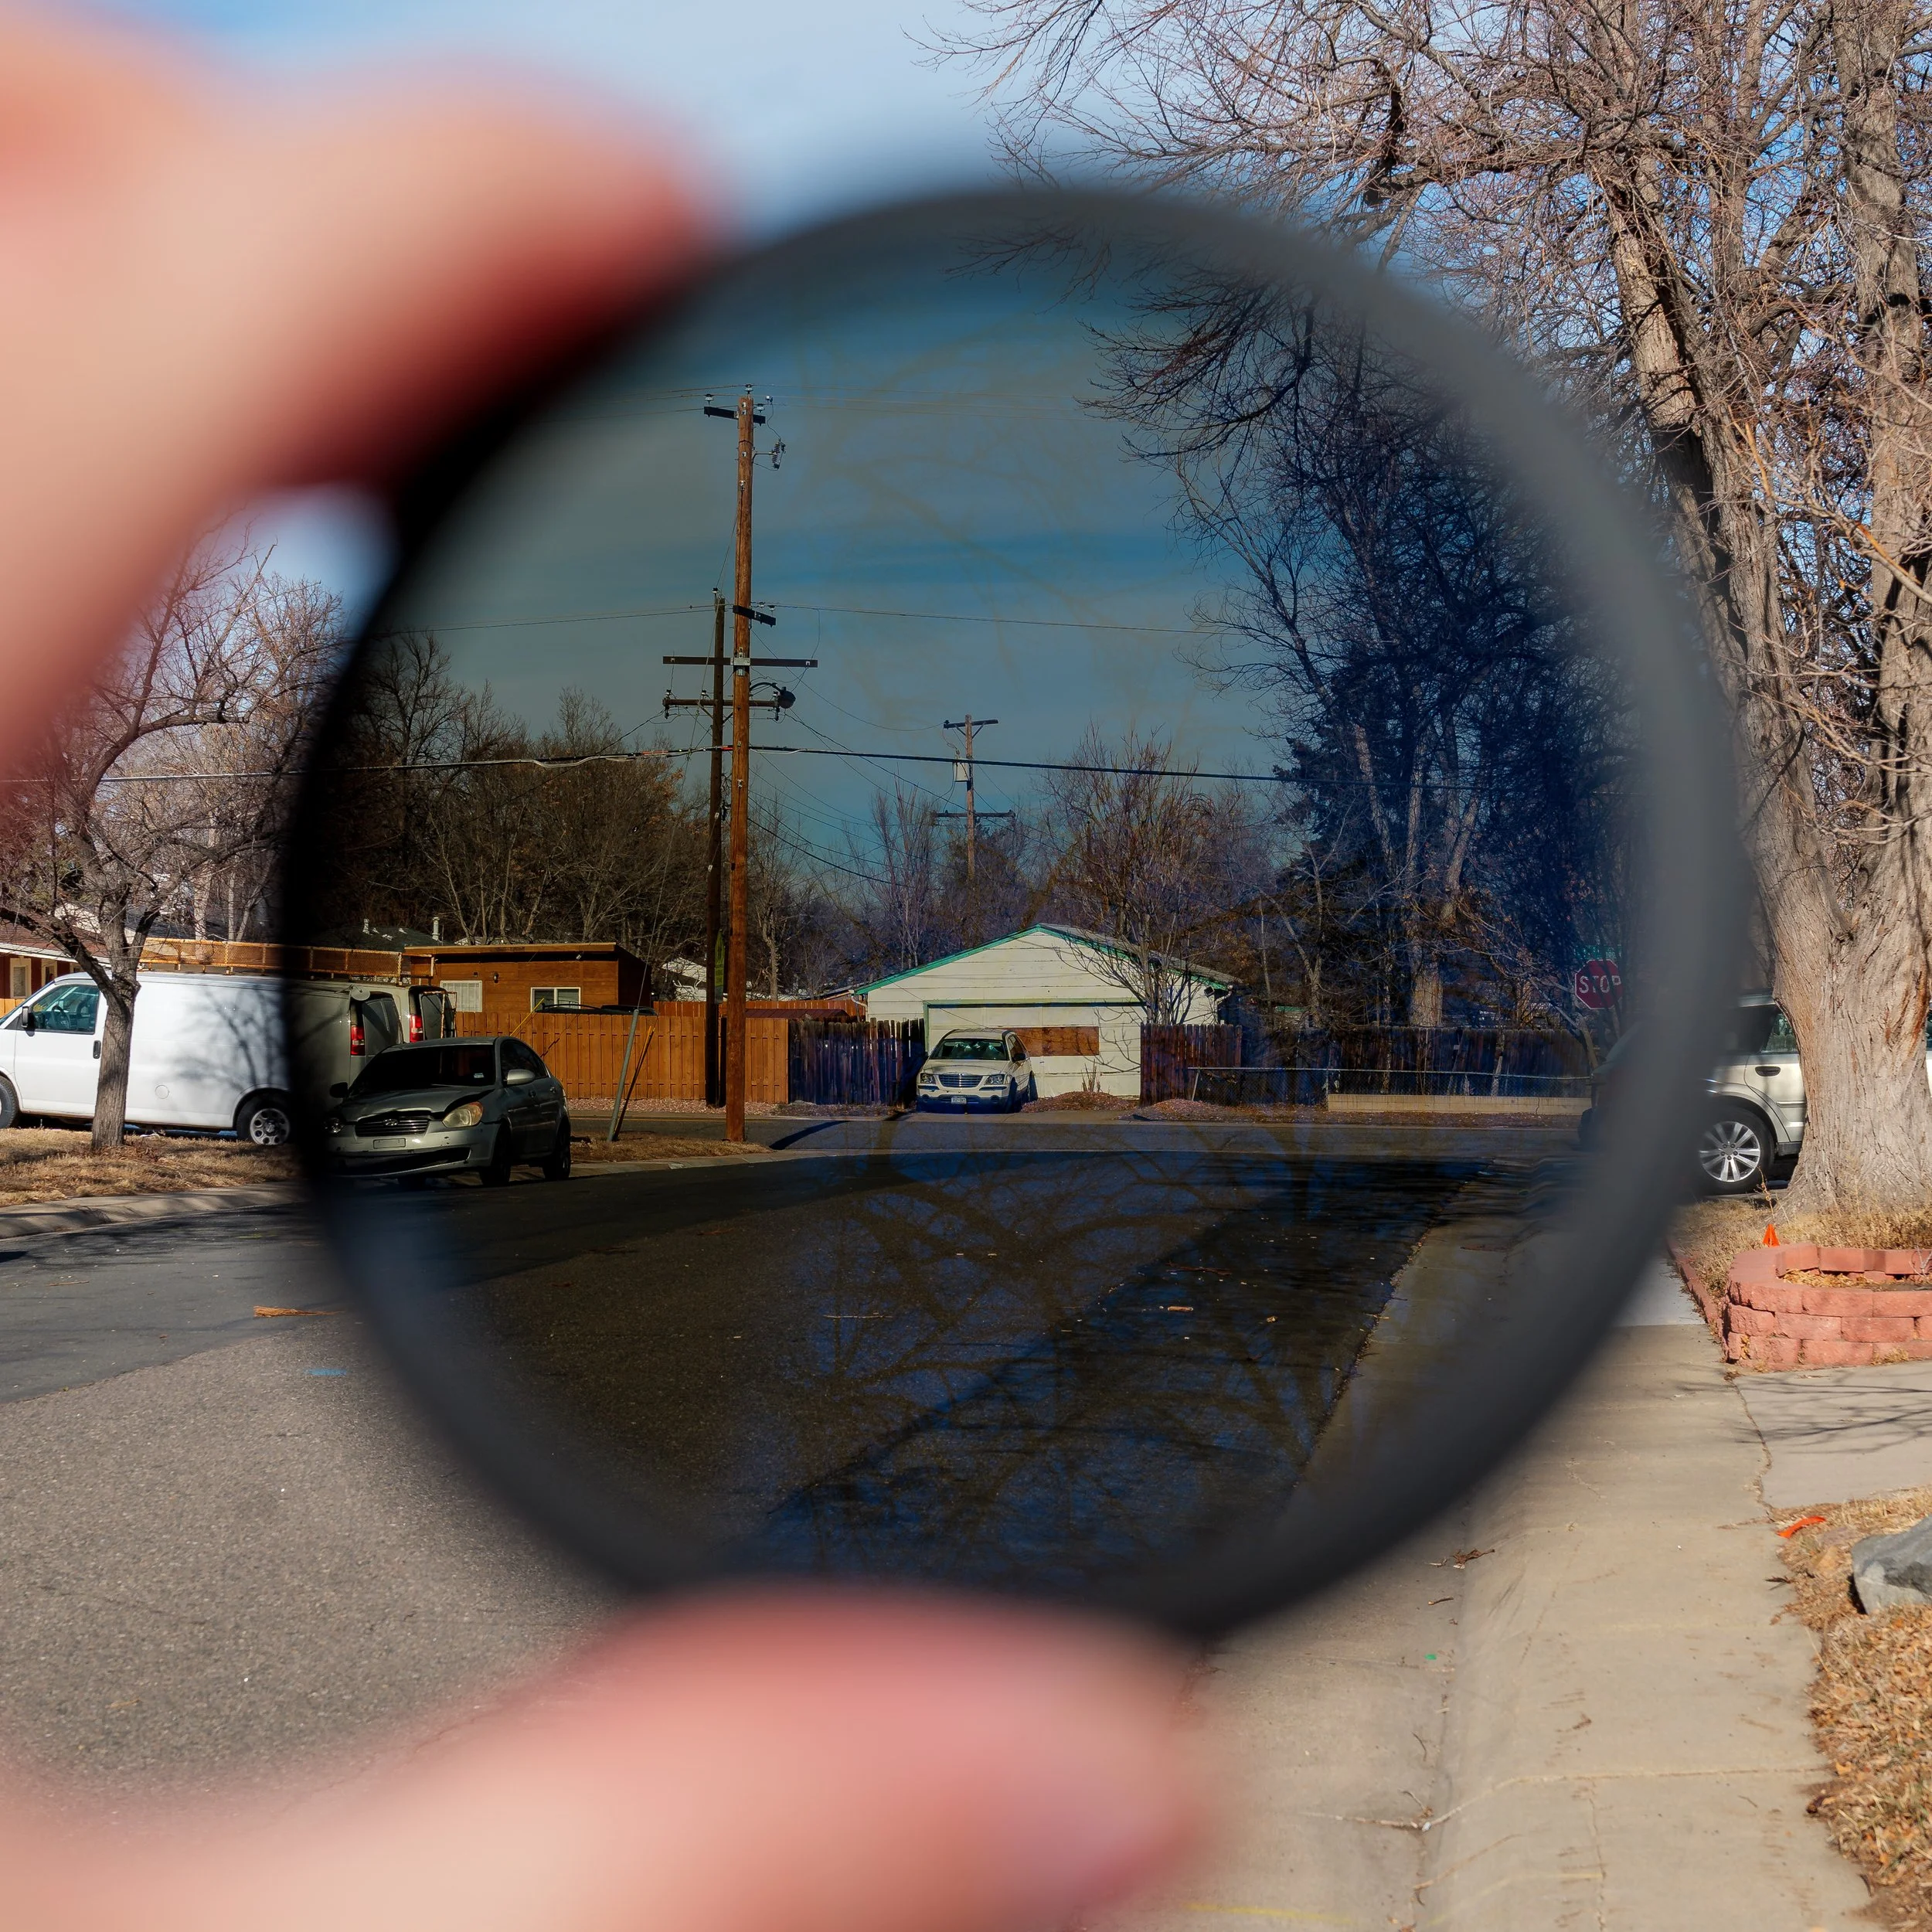
Use Either a Polarizer (CPL) or Neutral Density (ND) Filter!
What does a photographer on a bright sunny day and your drunk uncle on Thanksgiving have in common?
They can both be pretty embarrassing without a filter!
Thank you, thank you, I’ll be here all night. Please, try the veal!
Now hold on, before I hear any protests of “but I want my photos to be color accurate” or “I don’t want my images to look like a 2010s Instagram photo album upload” or “isn’t that cheating?”, let me first explain two things.
1) With or without a filter, the human eye and brain perceives real-life imagery fundamentally different than a camera does. And cameras models perceive images differently from one to the next anyhow, and even more so when outfitted with different lenses. AND our memories usually recall images as being different from how they were in reality on top of that. So in my humble opinion, the objection of “a filter will detract from real life color accuracy” is a bit of a fruitless side-quest of thought when you get right down to it.
2) Polarizer and Neutral Density filters were not made to create an aesthetic by way of overlaying stylistic colors anyhow. They are TOOLS used to PRESERVE image data. Let me say this one more time: Polarizer and Neutral Density filters were created to preserve color data! So whatever color accuracy you hope to retain on a day filled with hard natural lighting, will only be aided by the use of either of these filters!
So what is it that these two camera filters do? And what sets them apart?
A Polarizer Filter filters out the portion of the light spectrum which creates “White Light”. This aids in removing reflections from windows and water, but also by removing bouncing white light off of tree leaves, grass, and the sky and clouds. The resulting image will often possess much more vivid colors than what you would see without using one! These filters can be especially vital when photographing a bride and her white dress on a bright sunny day, and even moreso when you’re shooting said bride in an outdoor structure made entirely of white stone.
Neutral Density Filters are a bit more simple: they’re effectively sunglasses for your camera lens and make the overall image darker. But why would you want that? Couldn’t you just adjust your camera settings to make your image darker that way? Aren’t there like a bajillion camera settings for that very purpose? In many cases, yes. But in cases where you want to shoot using shallow focus, Or you’re shooting with a speedlight that doesn’t match a shutter above 1/200, or if you want to avoid toggling between a frame rate of 1/160 and 1/1000 every time the rare cloud does pass in front of the sun, the answer is a resounding NO!

Both Polarizer filters and Neutral Density filters are available with “Variable” variants, meaning the filters are constructed with two planes of glass and can become stronger in effect or weaker by rotating them. I strongly encourage anyone using these filters for the first time to buy a “Variable” version for yourselves as they will assist you tremendously in learning how to use them properly.
Hell, I’ve been doing this for YEARS and I still swear by the variable CPL and ND filters. I got shifting lighting conditions everywhere I go, I can’t be bothered with constantly swapping out different filters! Ain’t no one got time for that!
Consider Investing in a Speedlight or a Strobe
I’ll tell ya hwhat Bobby, I sure do dislike advising other photographers to solve ANY problem by telling them to just “spend more money, bro”.
But realistically, if you’re doing this professionally and you don’t have a supplemental flash or strobe, you WILL one day find yourself in a situation where your lighting conditions are absurdly bright AND one - or both - of your photo subjects are standing with their backs to the sun and their fronts are completely engulfed in shadow. And in that moment you will get a gut feeling that says to you “no matter how I adjust my camera settings, my filters, and no matter how I edit the resulting photos, these pictures aren’t going to come out looking normal”.
And brother, you’ll be right.
To avoid that panic-attack of a situation, you’ll want to obtain a speedlight or a strobe to fill in those harsh shadows so that you have more data to work with when it’s time to get down to editing.
Because while you can recover data from an underexposed part of an image (as we’ve already explored), a well exposed subject will always possess the most data to work with in your photo editing software. If you have a bright background and a dark subject, you will need to provide the subject with additional lighting.
If you don’t have either a speedlight or a strobe, I recommend obtaining a speedlight first.
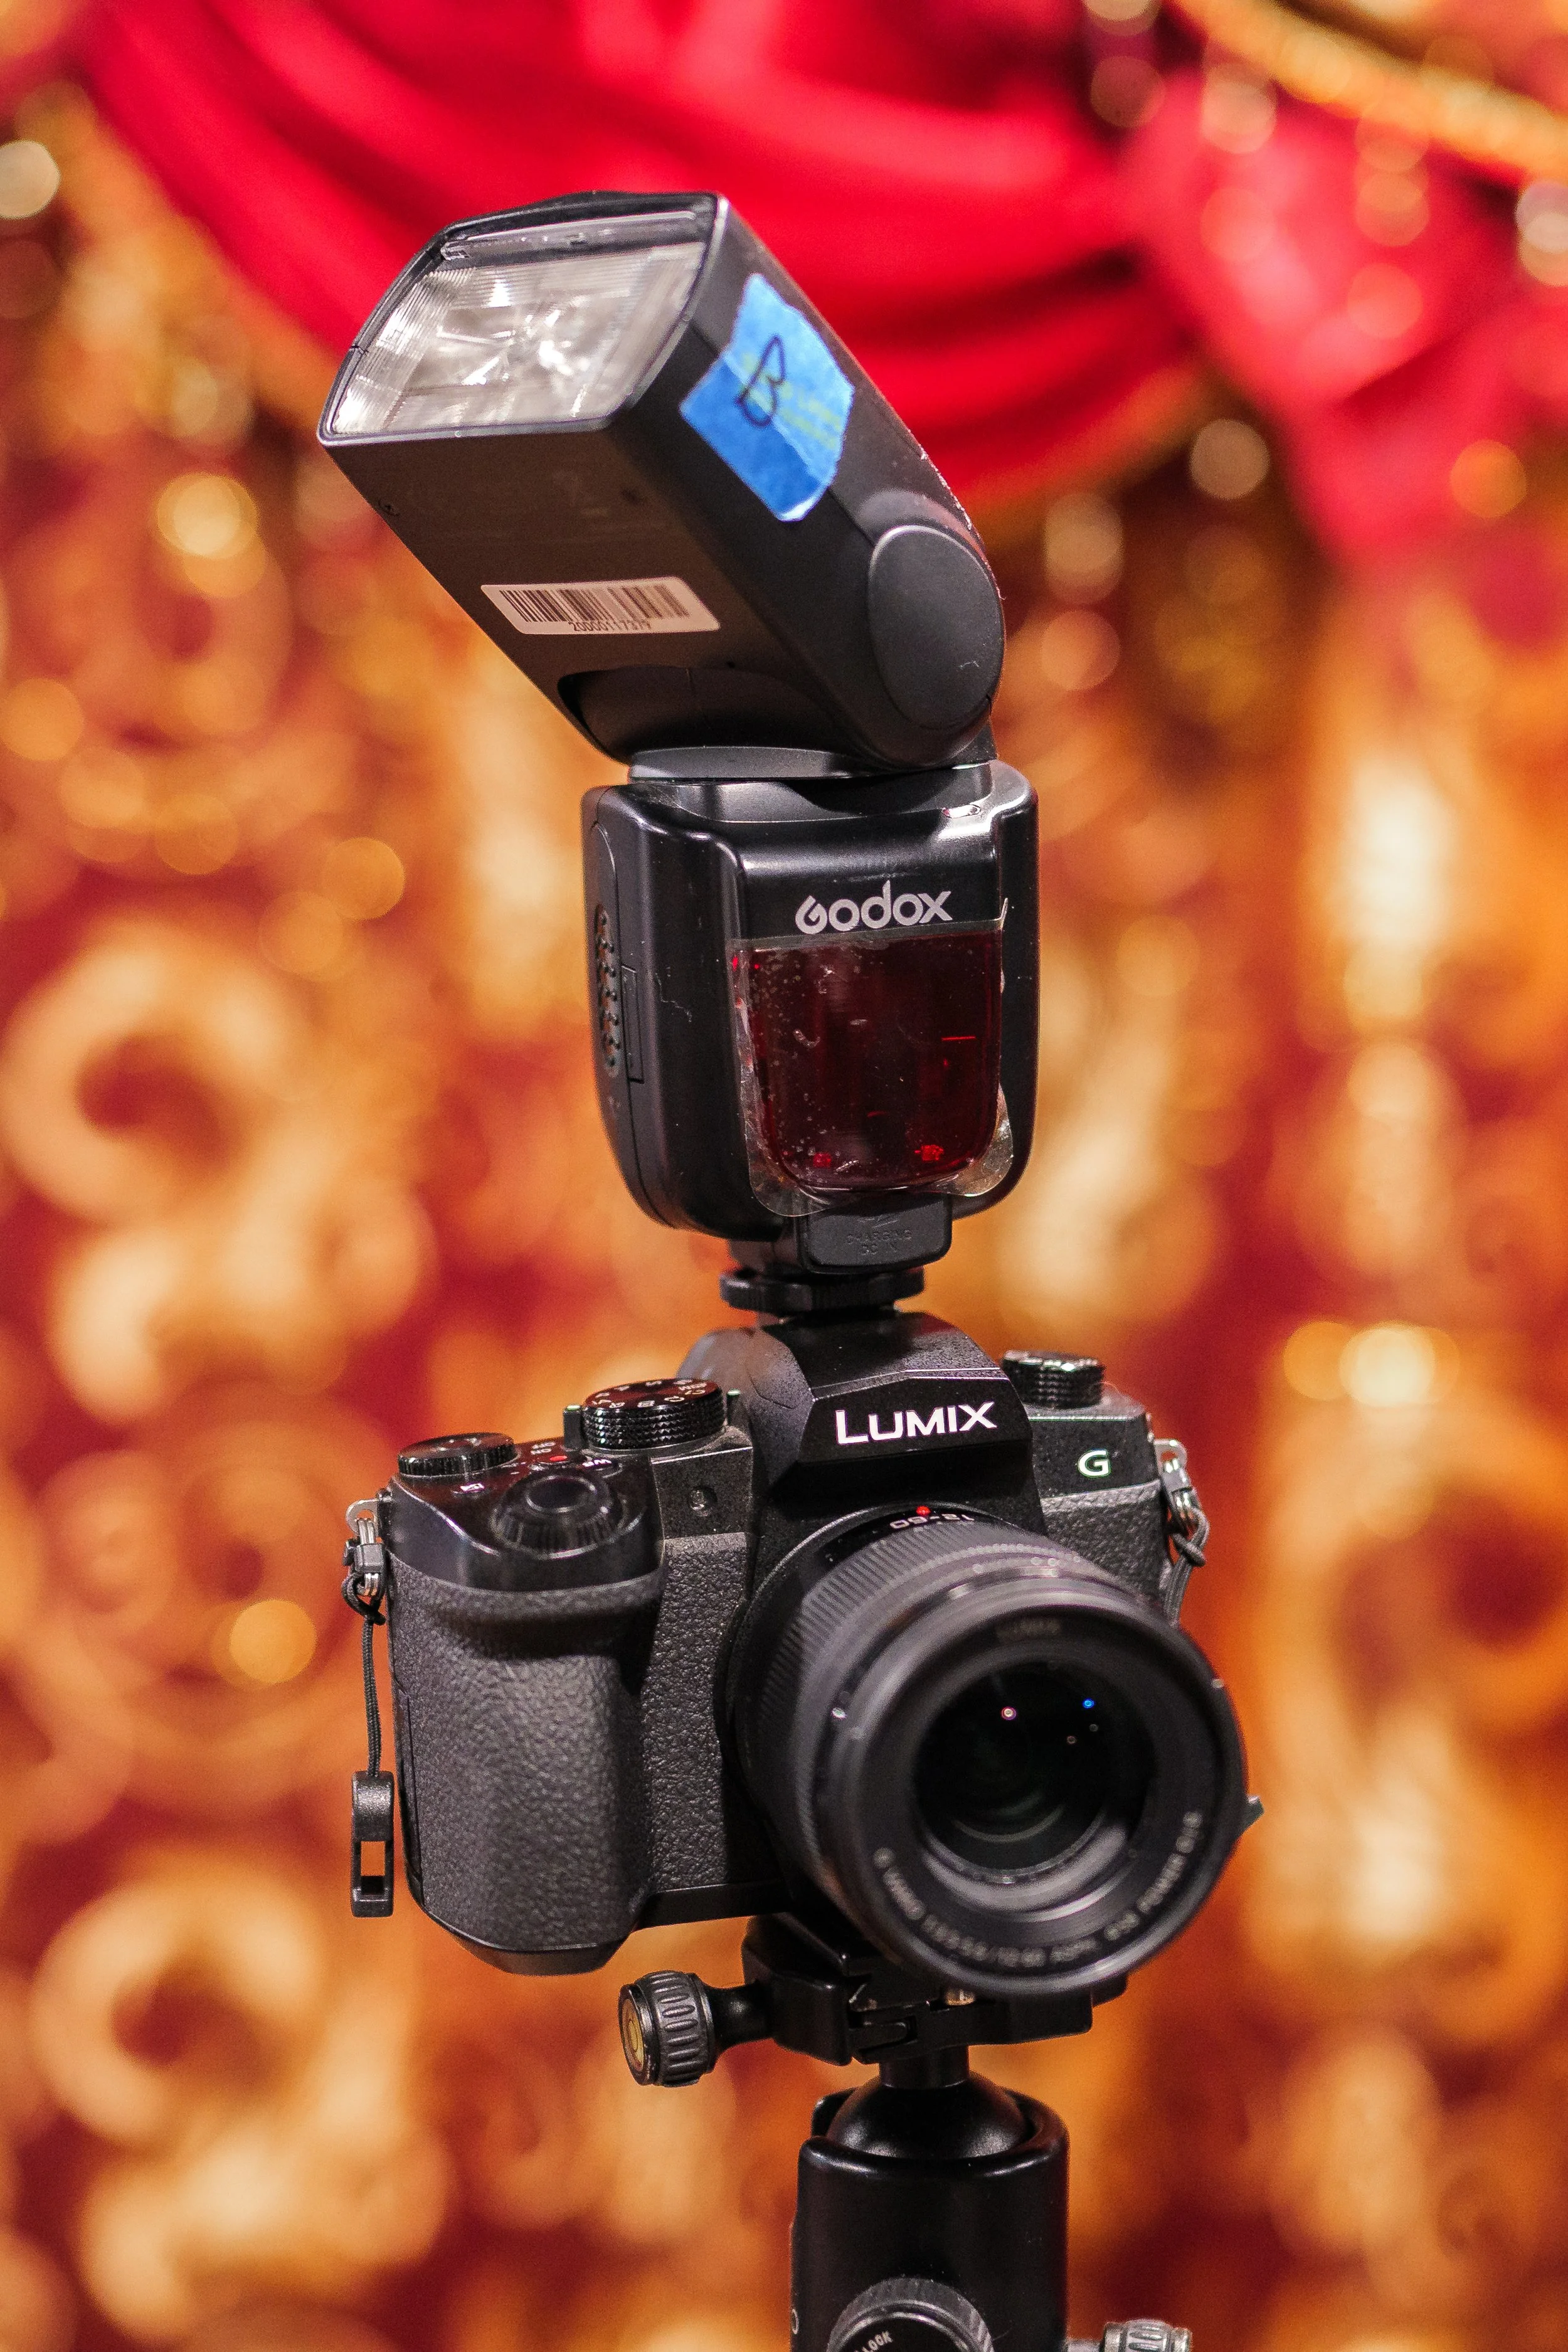
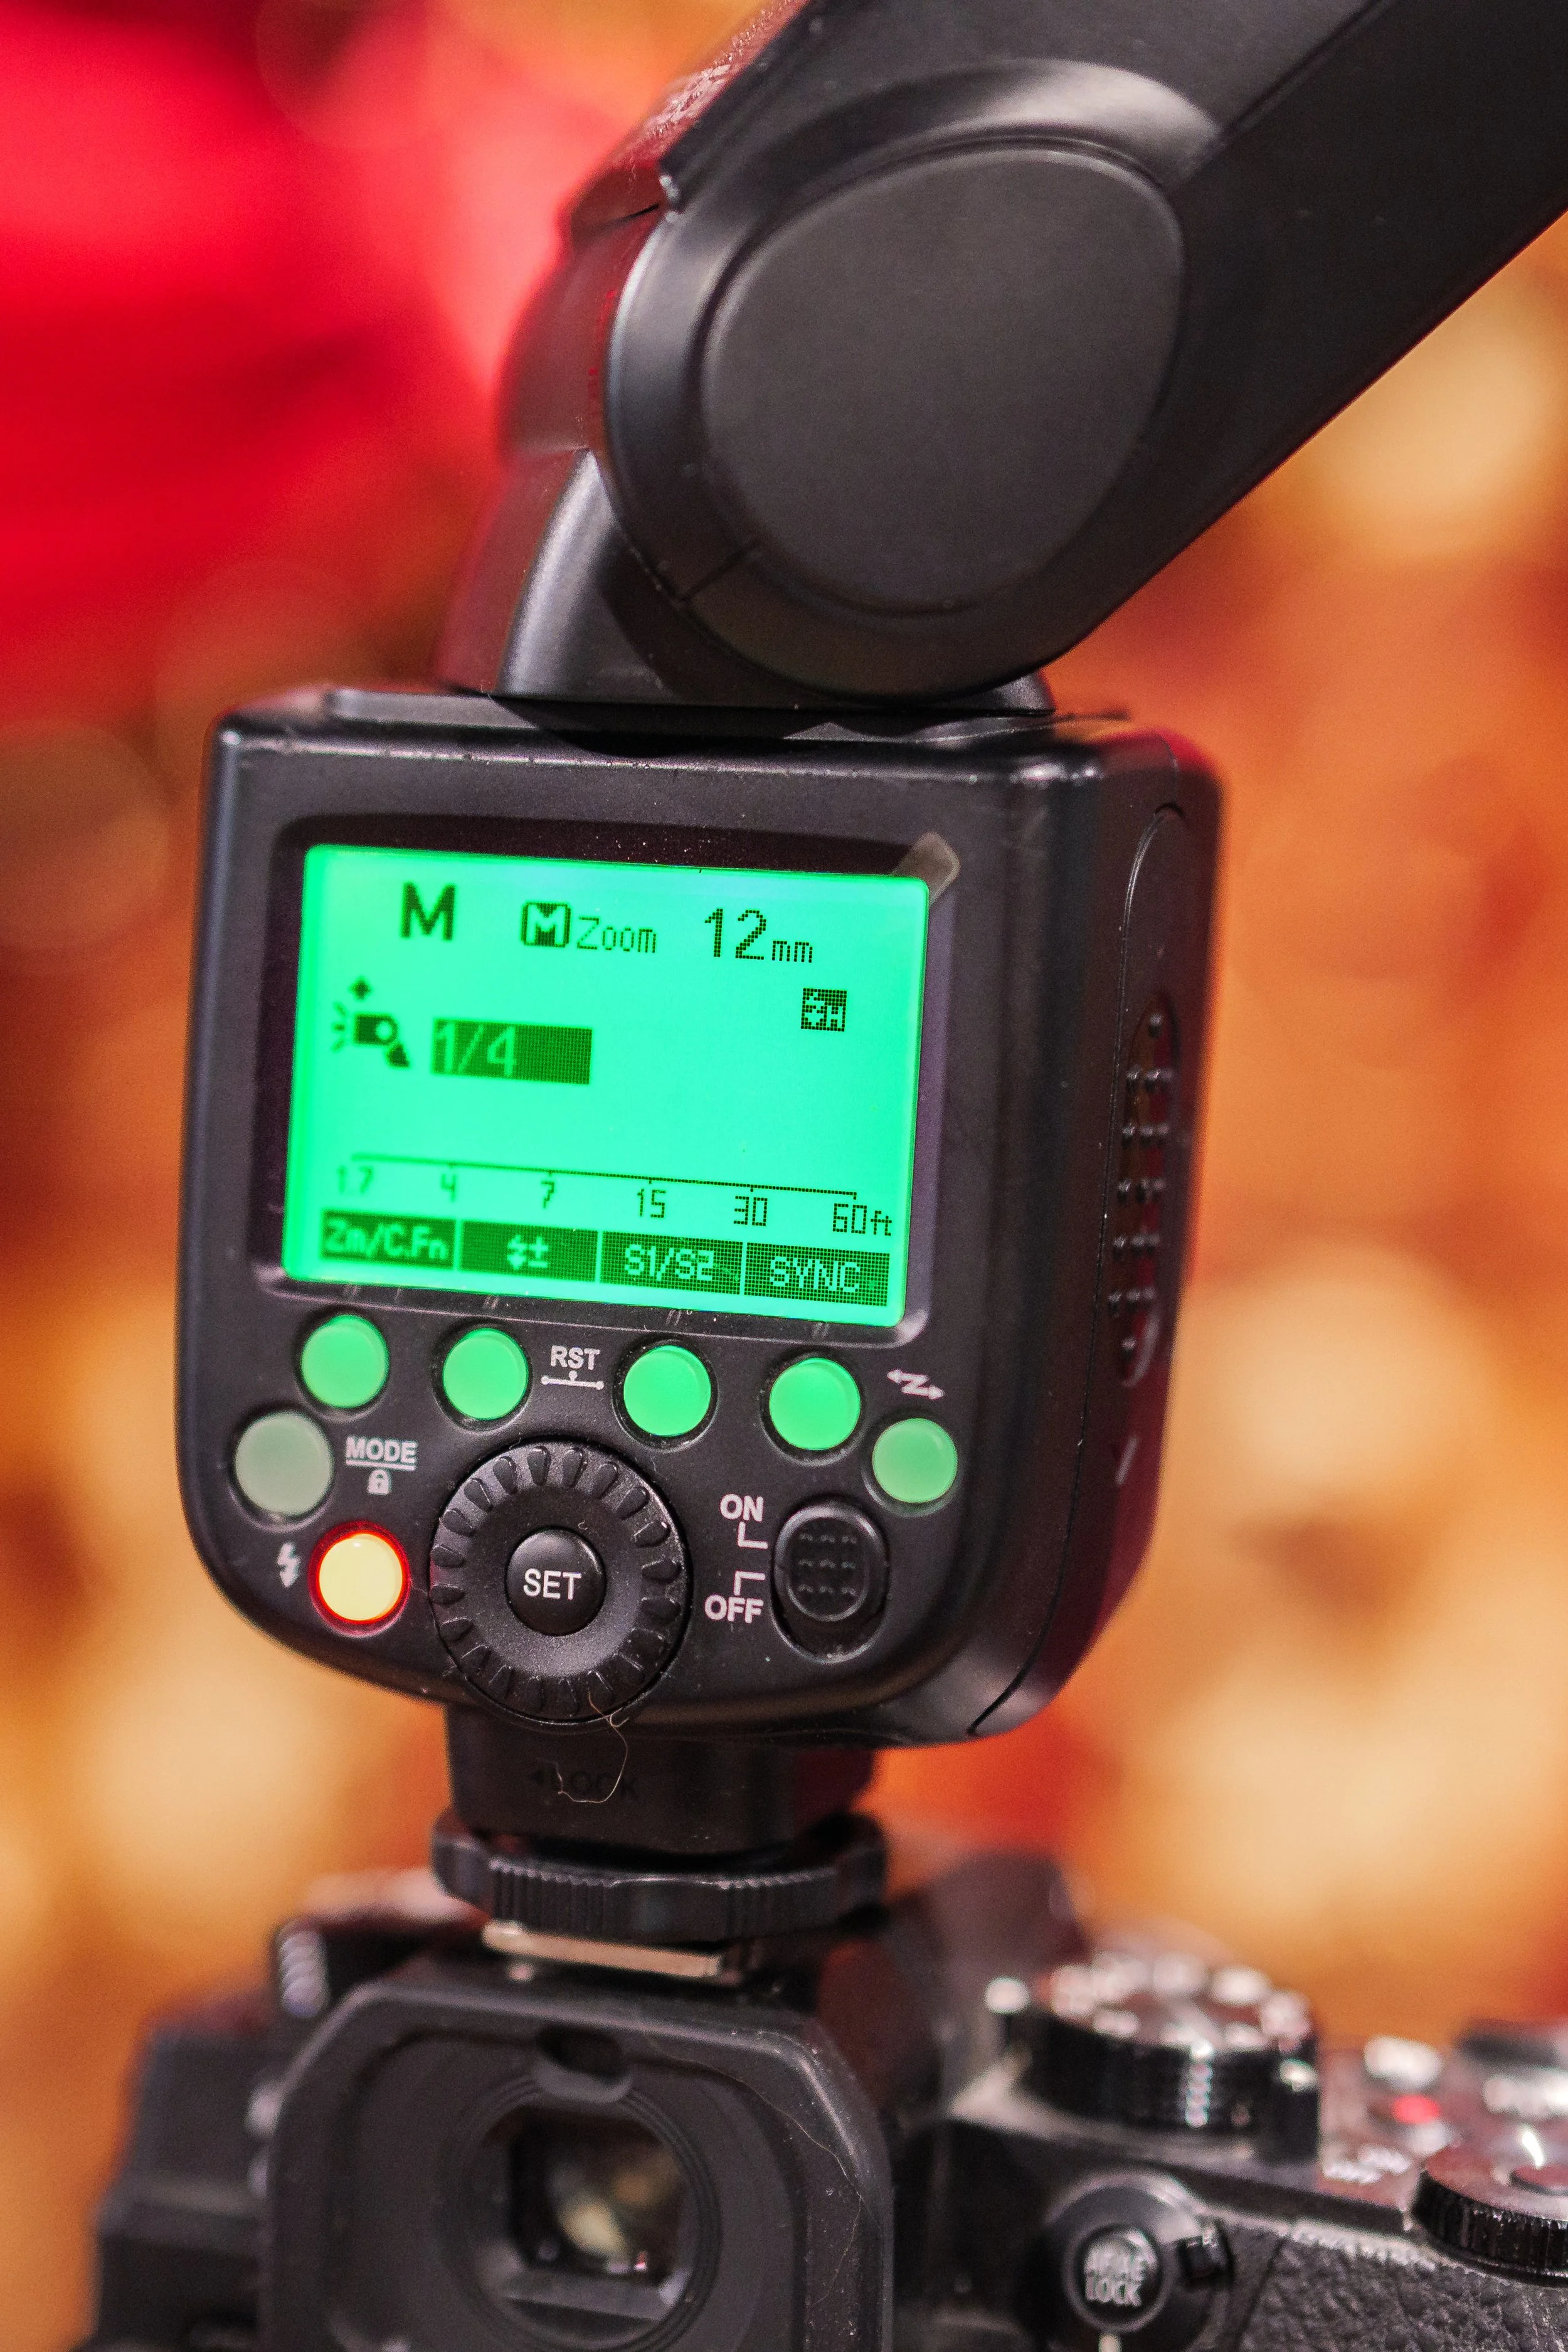
(Pictured above: one of my two Godox TT685O Speedlights that I often use in my work.)
Speedlights are typically mounted to the top of your camera and provide additional lighting – the strength of which can be easily controlled by adjusted a series of buttons or dials on the device. With the purchase of an additional signal receiver, a speedlight can also be used off-camera, by mounting it onto a light stand. This added versatility can become invaluable in instances where you want to separate the direction of your lighting from the position of your photography or when you want to step-up your portraiture skills. Also worth noting: the flash on a speedlight works on a swivel so that you can bounce the lighting off of the ceiling or against nearby walls in order to soften the light – all things that you CAN’T do with your camera’s native built-in flash.
Finally: if you’re using a speedlight and NOT bouncing your lighting, you really need to get on that! Direct flash has its places and times, but on average you’ll get a much more pleasing image by adding your Speedlight's flash to the pre-existing ambient lighting by pointing it upwards.
A Strobe is typically intended to be used on a light stand and often in a studio or outdoors. If a Speedlight is a shotgun of light then a strobe is a cannon of light!
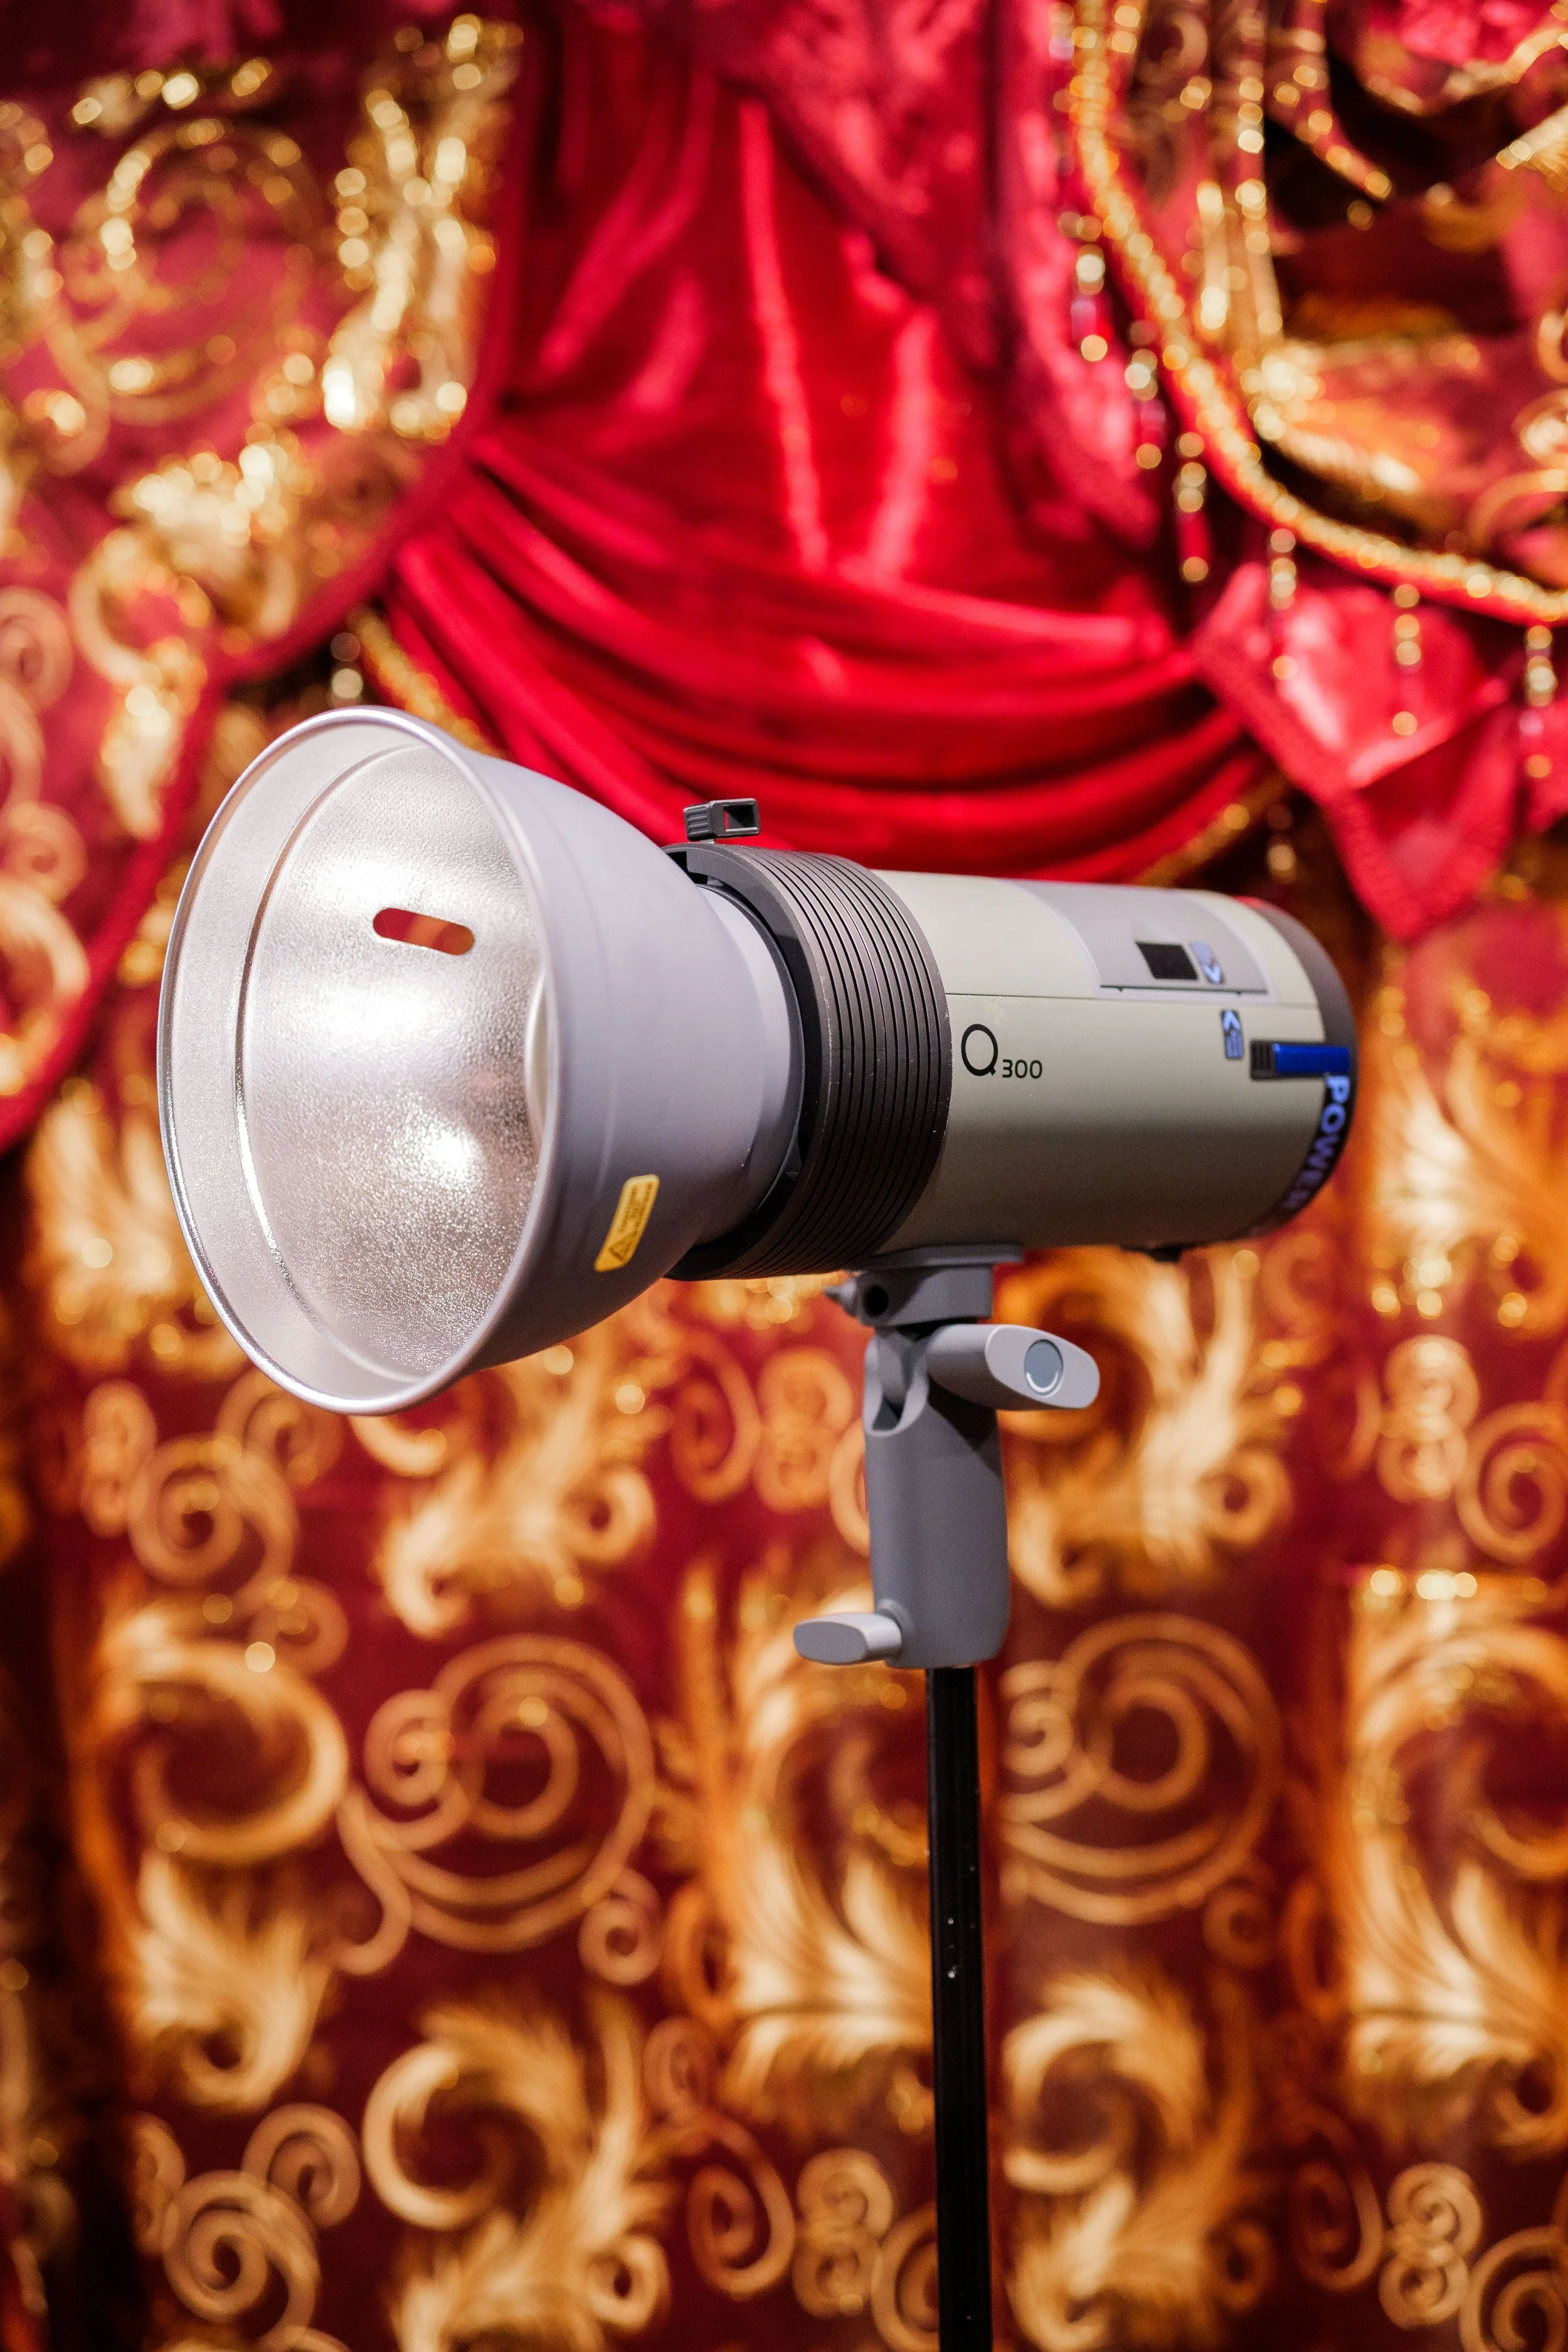
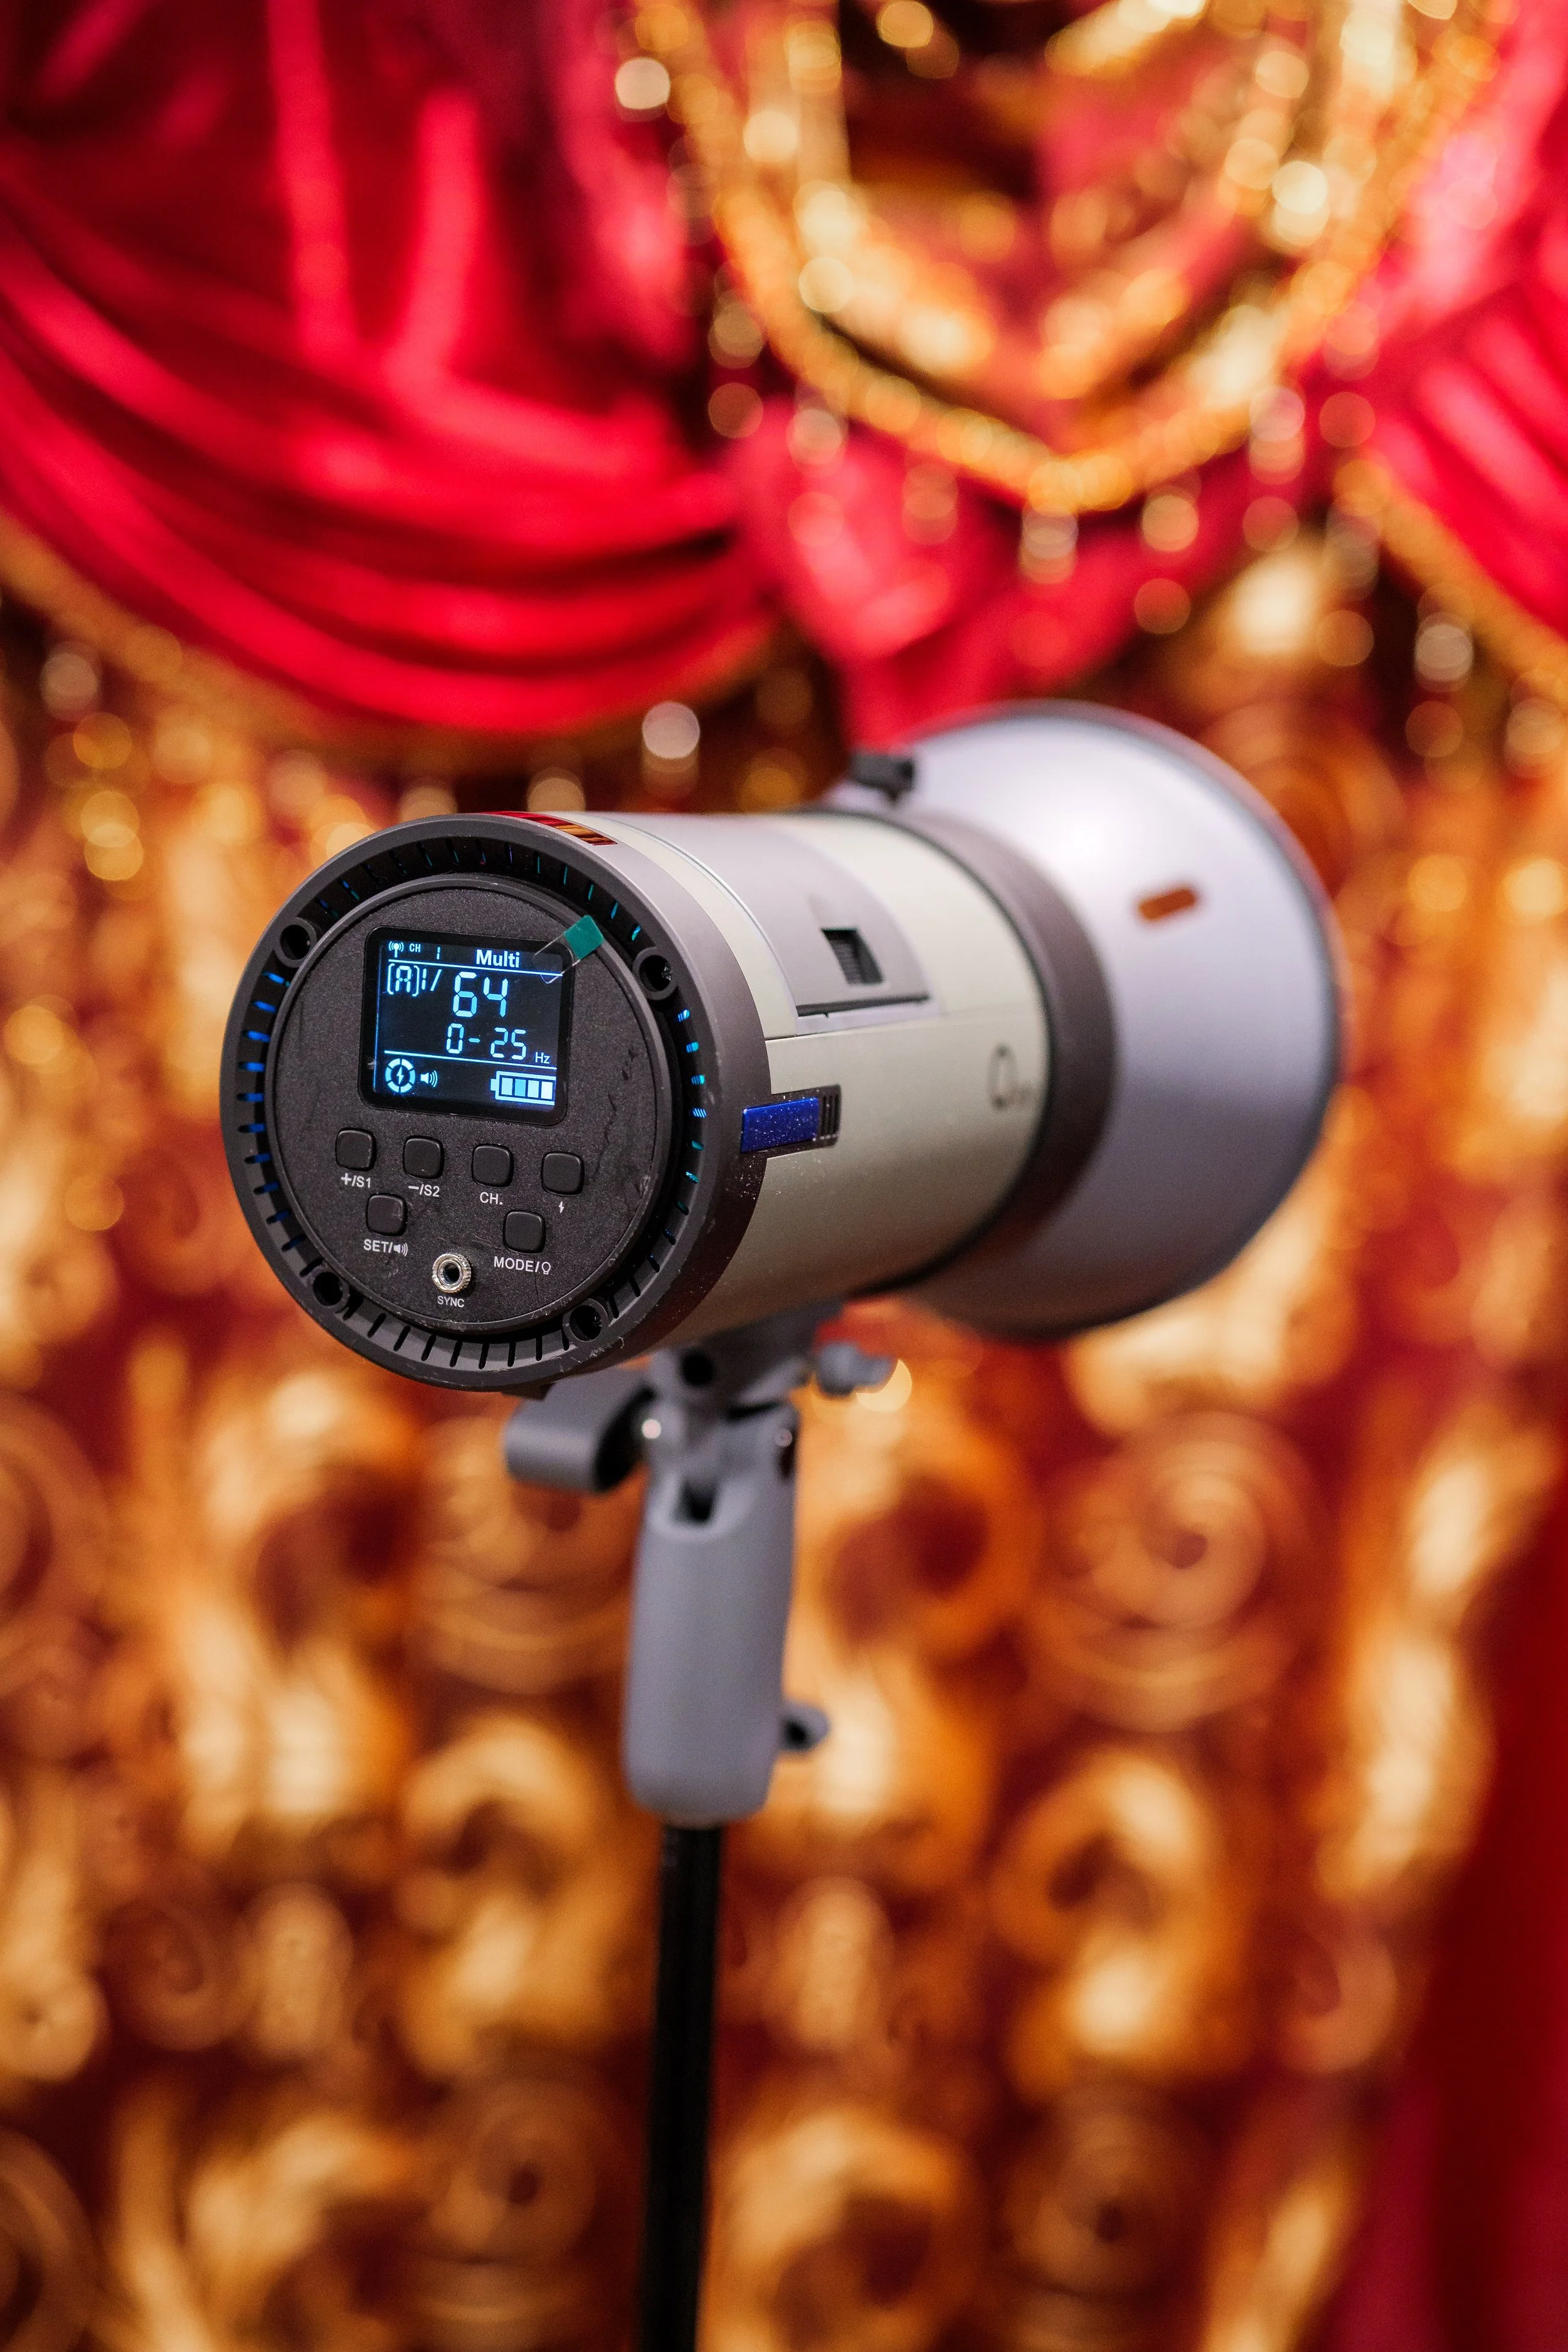
((Pictured above: one of the two Q300 Outdoor Strobes that I use.)
If you’re just starting out, you can typically hold off on buying one of these for a while. But should there be a day where you need to provide lighting to fill in the rock-hard shadows of a family 20 persons large at an outdoor wedding on a cloudless day, an outdoor strobe is the tool for the job. The same case also applies to extremely large interior venues in which you’re conducting a long series of family portraits in a big, dimly lit space. In those cases a speedlight is better than nothing, but 1-2 strobes really is the proper tool for the job.
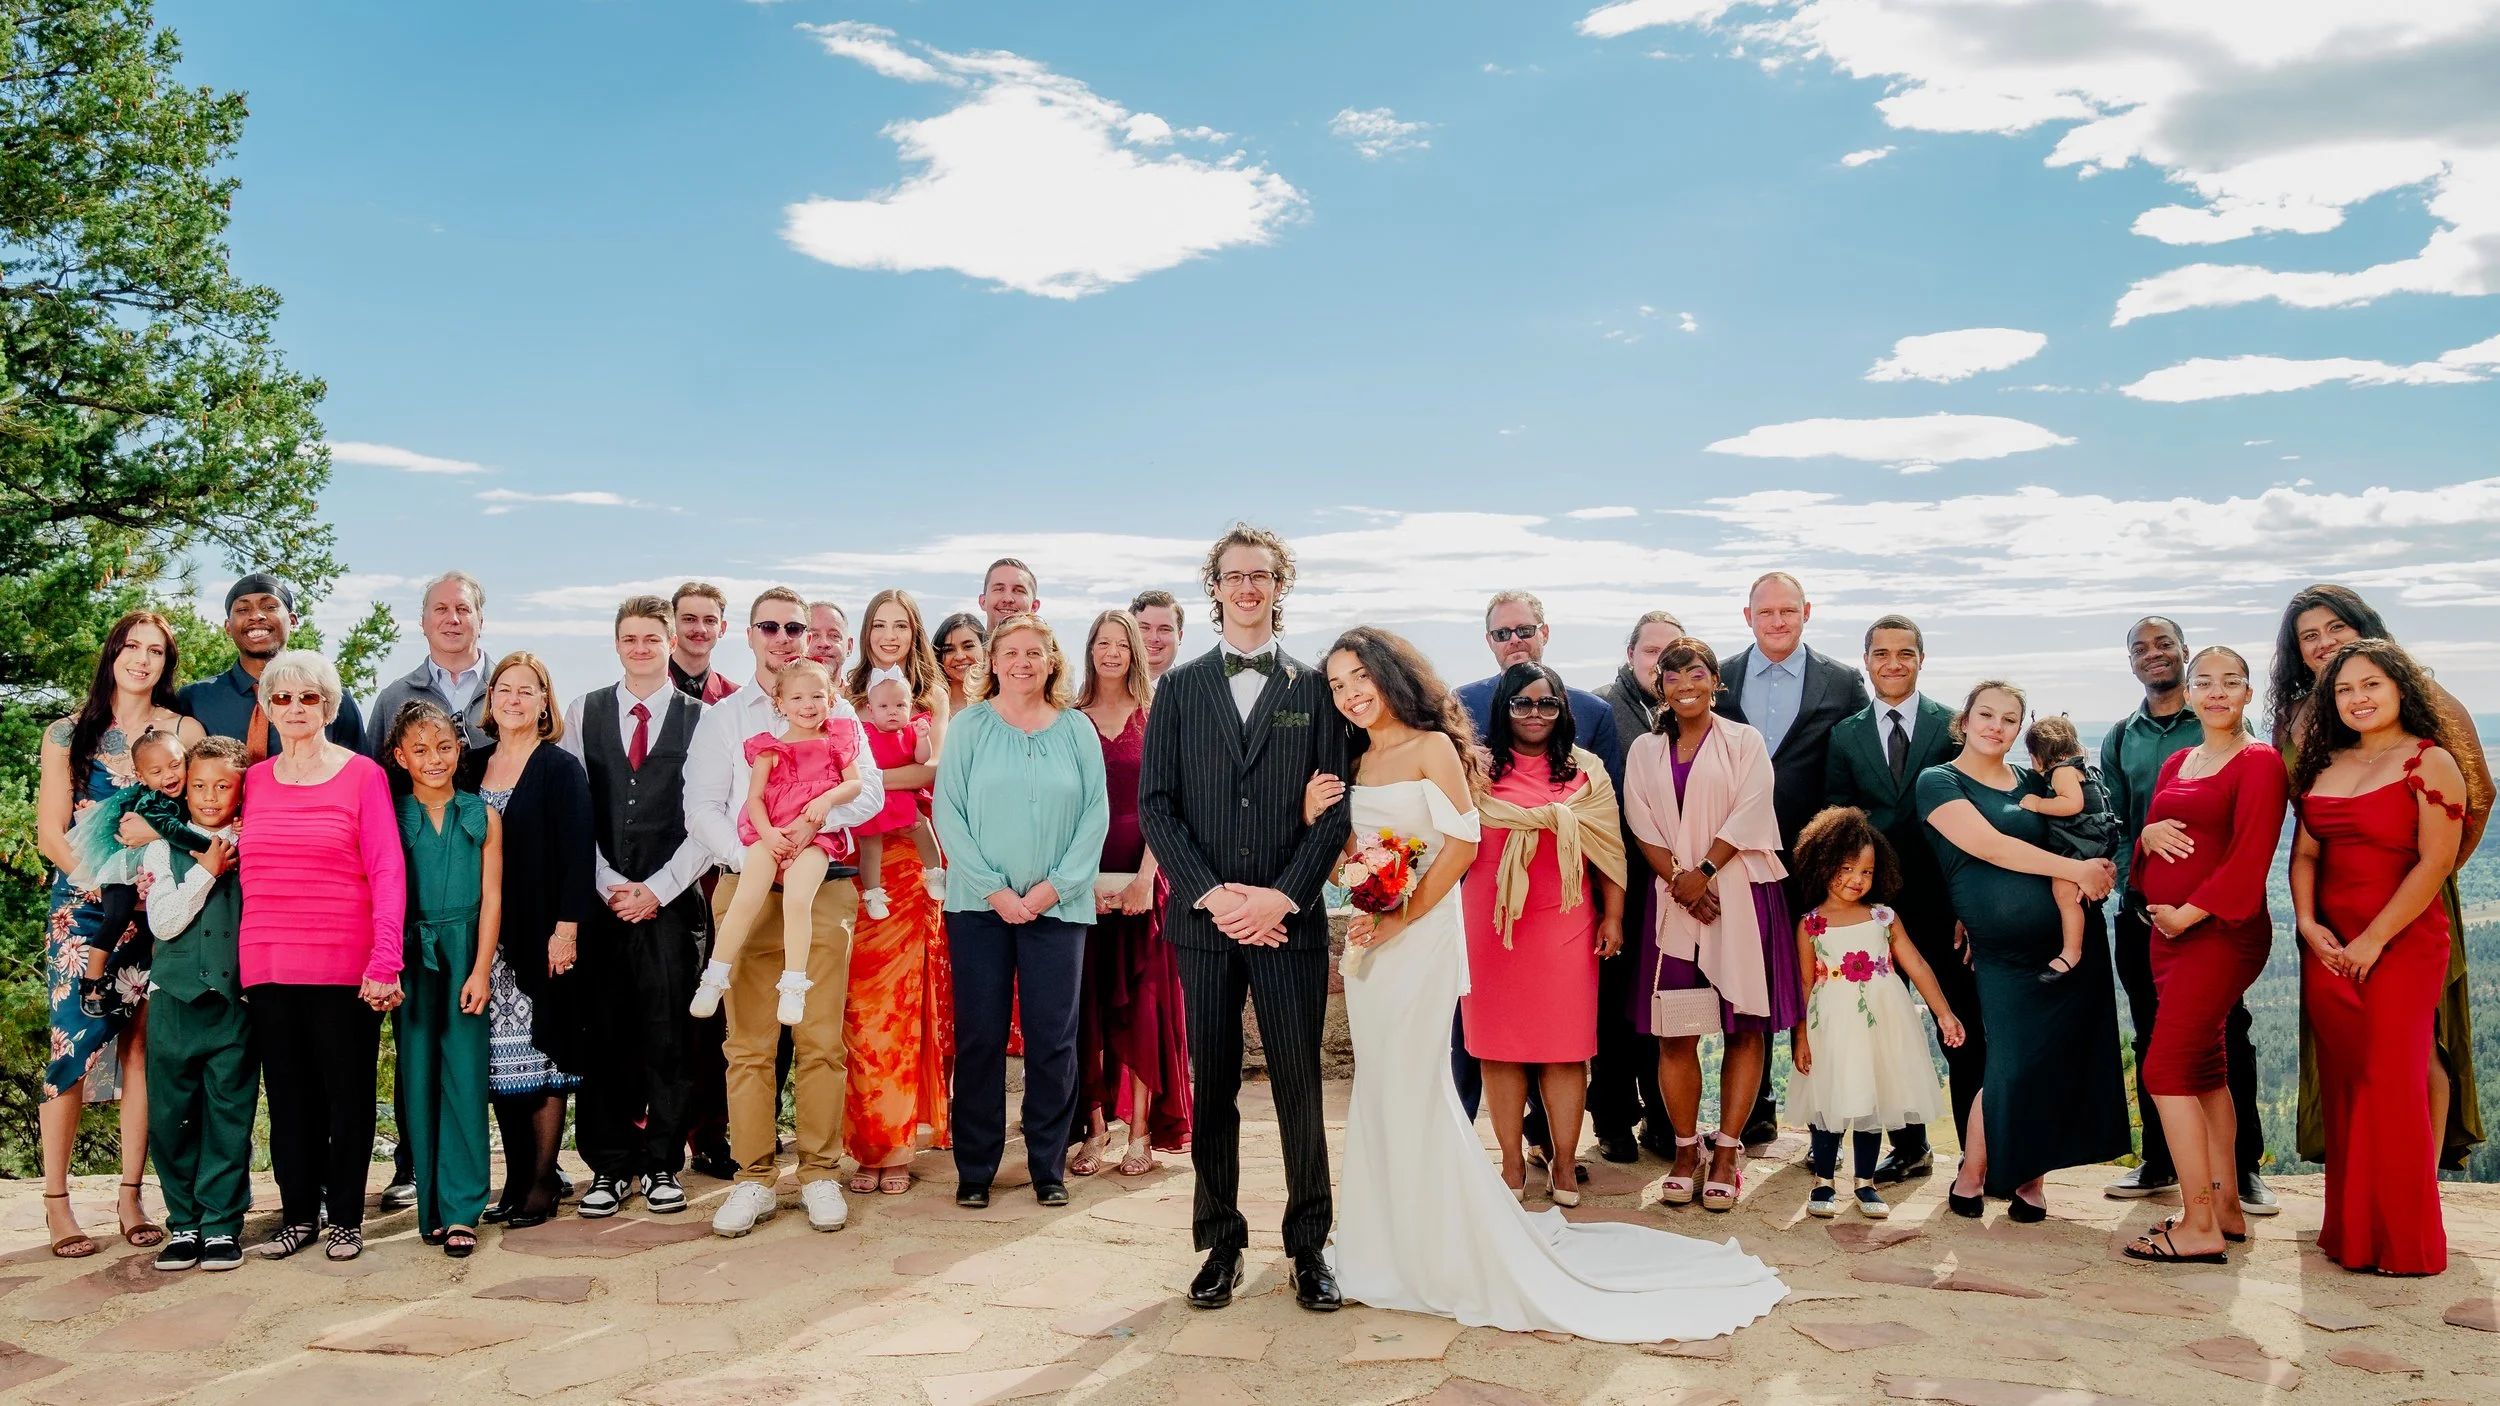
Keep those shadows out of your photo subject’s face and on the ground with an outdoor strobe.
And that about wraps ‘er up! Did you have fun reading this? I had fun!
And I think we all learned a little something too.
Wow, how nice this has been! Well…tell your grandma I said “Hi”, if you could. I hope she’s doing well.
Oh, and did you get a chance to read that book I sent you?
No?
Not yet?
Ah, no worries!
What did I think of the book? Oh no, I didn’t read it either, I don’t really care for James Patterson. I just lent it to you to get it out of my own collection.
In any case I hope you have a wonderful day! ‘Til next time, remember that Photography is the Art of Optimism, as it requires you to view all things from the best of all possible perspectives!